
Honest truth, this humble but popular street food snack convinced me to move to South Korea (along with hotteok)! I first came upon gyeran ppang, or egg bread, during a 48-hour layover in Seoul. It was the peak of winter in January when I came across an egg bread stand in the middle of a boulevard that looked to me like a warm oasis. A bite was all I needed to push myself to finally move overseas, and one year later, I was abroad.
Update Disclosure: This post has been updated for one or more of the following reasons: easier reading, updated photos, clearer instructions, and just plain ol' improvements to the recipe (as noted).
Jump to:
Lucky for me (and you!), it's easy to recreate at home with this quick and easy Korean egg bread recipe.
What is Gyeran Ppang?
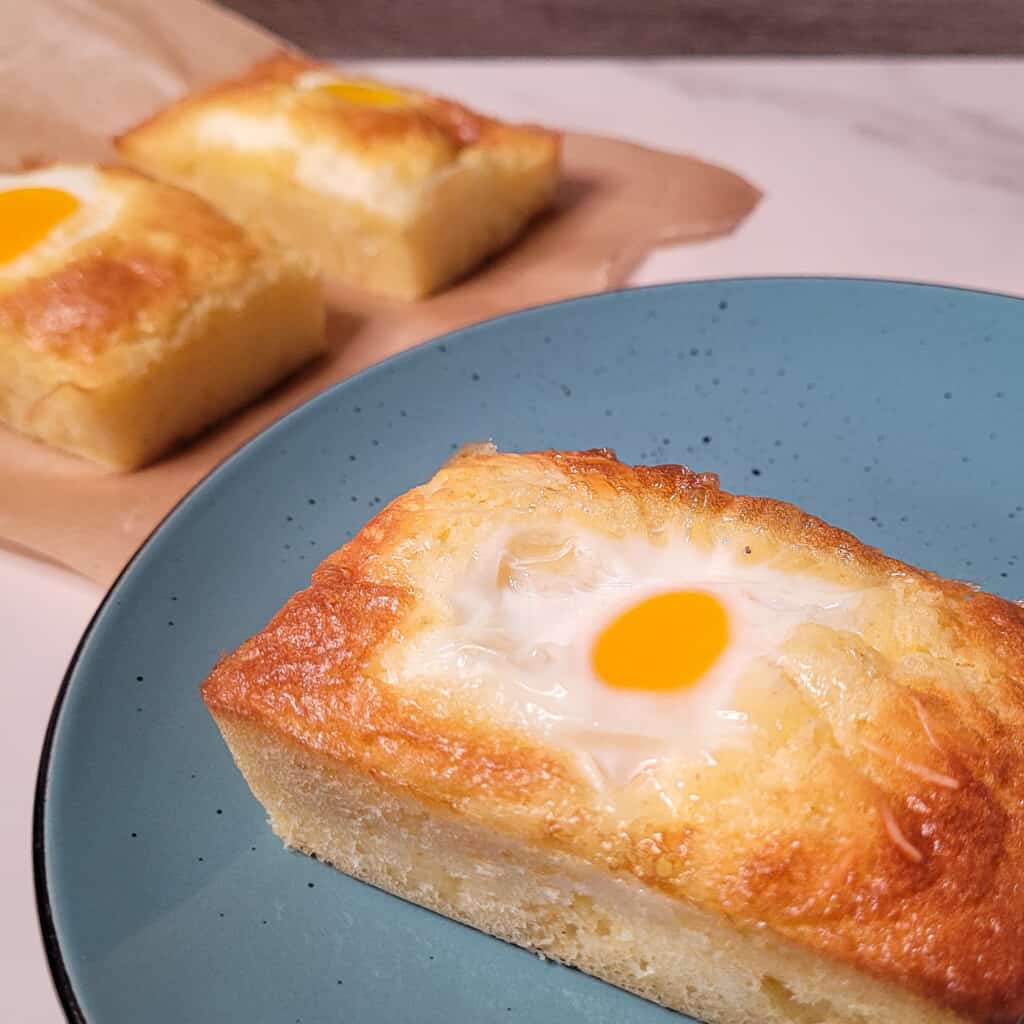
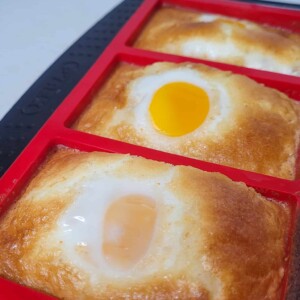
There are two parts to this handheld snack. The bottom is a fluffy cake base to support the top half, which consists of a baked egg. Many come in variations with additional toppings, such as chopped green onions, cheese, bacon, hotdog, etc.
Ingredients For Korean Egg Bread
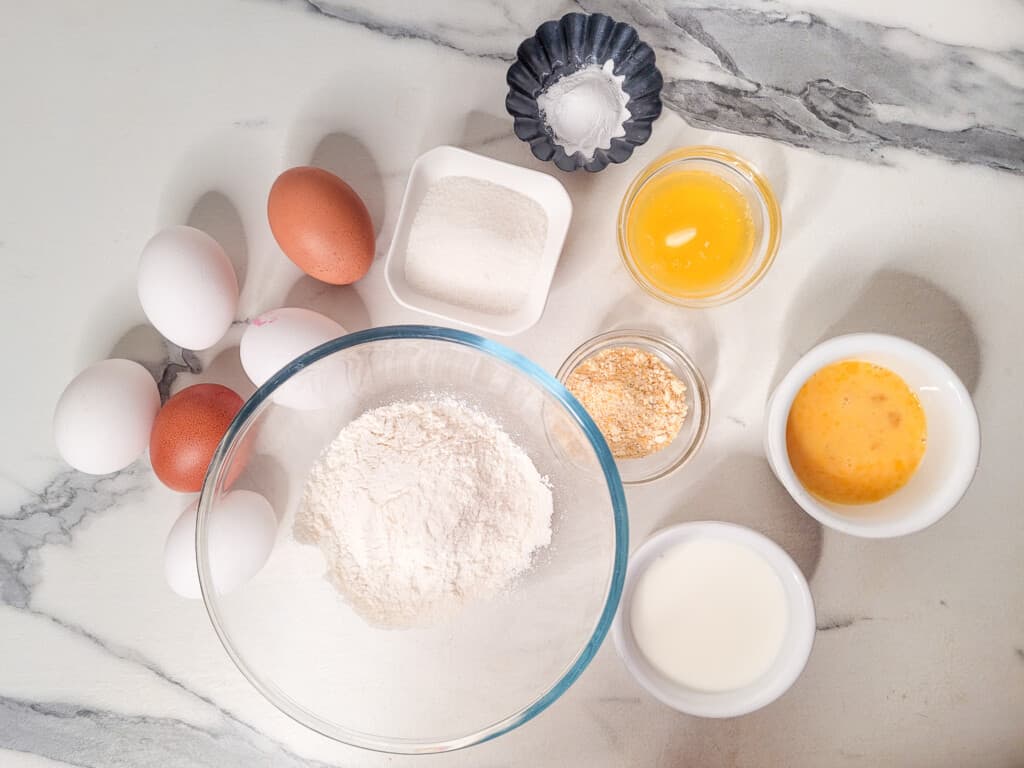
We need but a few ingredients for this gyeran ppang recipe. It's a great go-to when you feel like you need to get rid of eggs quickly. Each bread will be topped with an egg!
- All-Purpose Flour: You will use all-purpose flour for this recipe.
- Corn Meal: Use finely ground corn meal or simply corn flour to retain a soft cake texture.
- Milk: This will make the cake lighter in texture.
- Egg: It will add a bit of structure to the cake and better hold the egg topping.
- Baking Powder: Make the cake fluffy and rise - but not too much! Too much baking powder will "swallow" the egg, but we want it to stay on top as it bakes.
- Sugar: Gyeran ppang should taste like a cake, and this recipe makes a sweet version that goes well with the cracked egg.
- Butter: Helps to make the cake soft.
- Salt: Additional flavor to the cake to help counter the sweetness while enhancing the egg flavor.
Substitutes
- Corn Meal: You don't have to use corn meal in this recipe. Add the same amount of flour to replace the cornmeal. The overall texture will be be similar to a cupcake.
- Baking Powder: You can use a fourth teaspoon of baking soda with just as much acid such as white vinegar or lemon juice.
Recipe Tips
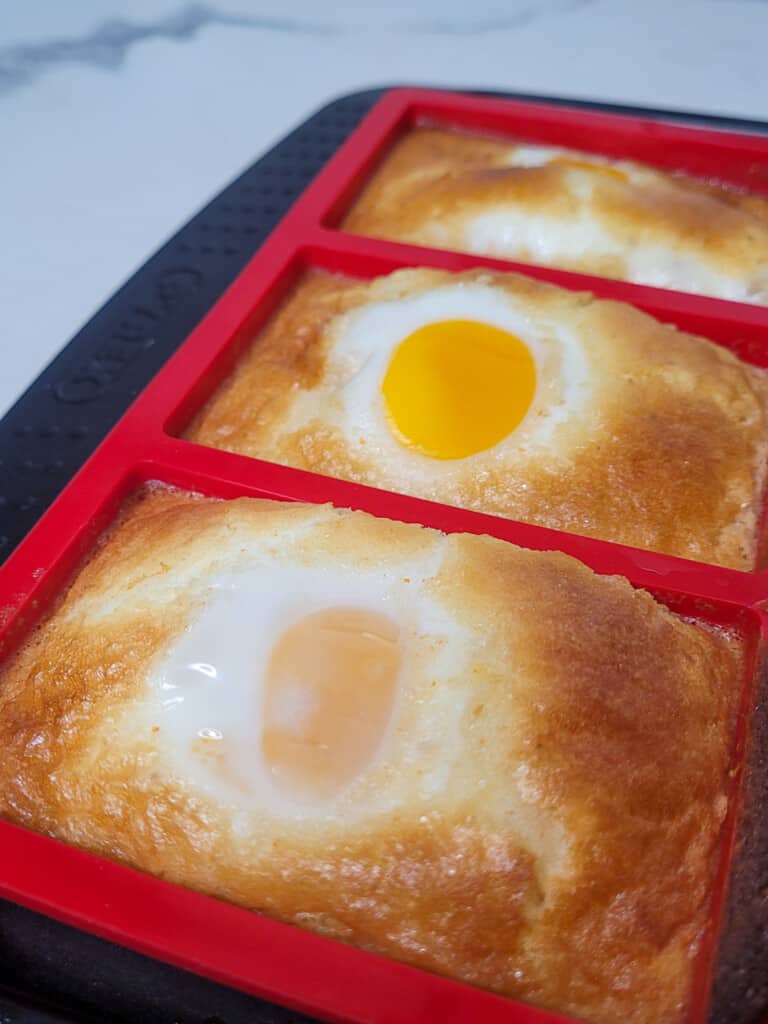
- Be Gentle: Do not crack the egg over the batter. Instead, crack the egg in a small bowl then gently let it plop onto the raw dough.
- Add More Toppings: Between steps three and five, feel free to layer other ingredients into the egg bread in the order you want. For example, I like to place sheets or pieces of cheese before adding the egg. I also like to spread some green onions on top of the egg for flavor and color.
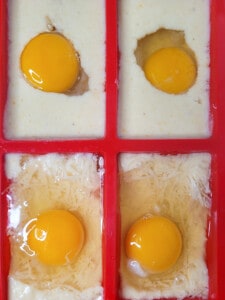
- Don't Overfill the Molds: Depending on the size of your mold, you could fill only up to a third of each mold space. The egg takes up a surprisingly large amount of room.
How to Make Gyeran Ppang


There are only a few steps involved in making this snack. I love that these bake much faster than a regular-sized cake, so you don't have to wait long!
- Preheat your oven to 175°C (350°F).
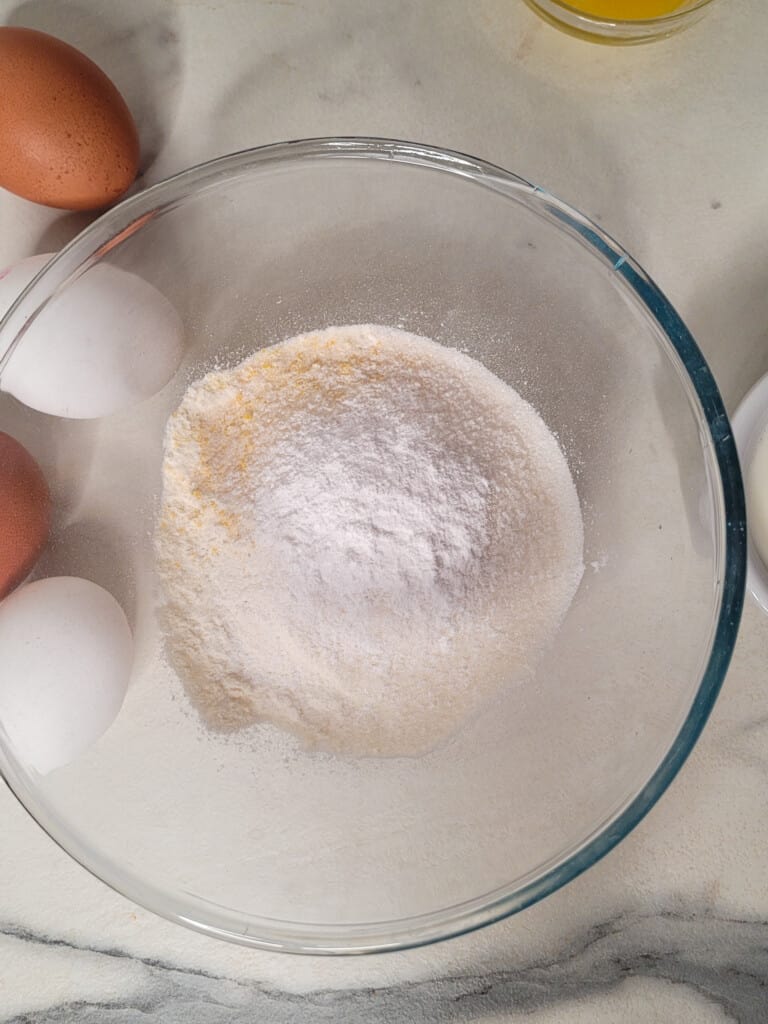
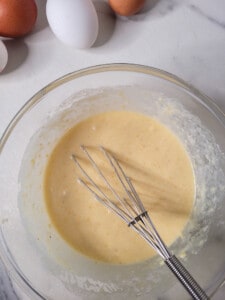
- Mix flours, sugar, egg (for cake), baking powder, salt, milk, and butter in a bowl.
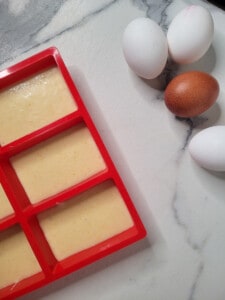
- Fill the molds with the batter while making room for the eggs.
- Top each mold with an egg.
- Bake for about twenty minutes or until golden brown and egg has solidified.
- Let the egg bread cool for five minutes before removing it from the mold.


How to Serve
This quick snack should be consumed immediately to enjoy the benefits of the fluffy cake and warm temperature. The best weather for this is when the weather is cold. It goes perfectly with a cup of hot tea!
Korean Egg Bread (Gyeran Ppang)
Disclosure
The equipment and ingredients sections contain affiliate links to products I love to use as well as items that I personally believe make this recipe the best version of itself.
Ingredients
Egg Bread Batter
- 125 grams all-purpose flour
- 24 grams cornmeal, finely ground or corn flour
- 1 teaspoon baking powder
- 300 grams granulated white sugar
- ¼ teaspoon salt
- 57 grams unsalted butter, melted
- 184 grams milk
- 1 egg, whisked
Egg Topping
- 4-6 eggs
- melting cheese optional
- chopped herbs such as chives optional
- bacon slices optional
Instructions
- Preheat oven to 175°C (350°F). Add dry ingredients (flour, salt, baking powder, sugar, cornmeal) to a bowl and whisk together.
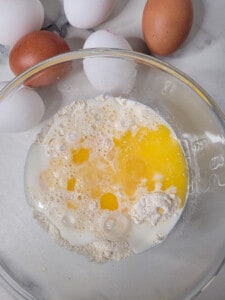
- Add melted butter, whisked egg, and milk. Mix into the dry ingredients until smooth and the batter is slightly thin.
- Fill a muffin mold or mini-loaf silicone mold about a third of the way with the batter.
- Add an egg gently on top of each filled mold and add optional toppings.
- Bake for about 15-20 mins depending on your mold. Let sit for 5-10 mins to cool before serving while still warm.
Nutrition
Have You Tried This Recipe?
Simply rate the recipe by clicking on the ⭐️s on the recipe card. Have something to say? Please leave me a comment down below telling me what you think of this recipe.
Bonus: Let me and other readers know what you did to make this recipe your own - 💫 let's inspire each other!
Also, follow me on Instagram [@seesfoodwilltravel] and send me a DM with a picture of what you made. I would love to share and celebrate YOUR creation with our budding community 💞
Check out Sees Food, Will Travel on Pinterest and Facebook for more delicious updates.


Leave a Reply