
Disclosure: Some of the links in this post are affiliate links. This means if you click on the link and purchase an item, Sees Food, Will Travel will earn a commission at no extra cost to you. See terms and conditions for details.
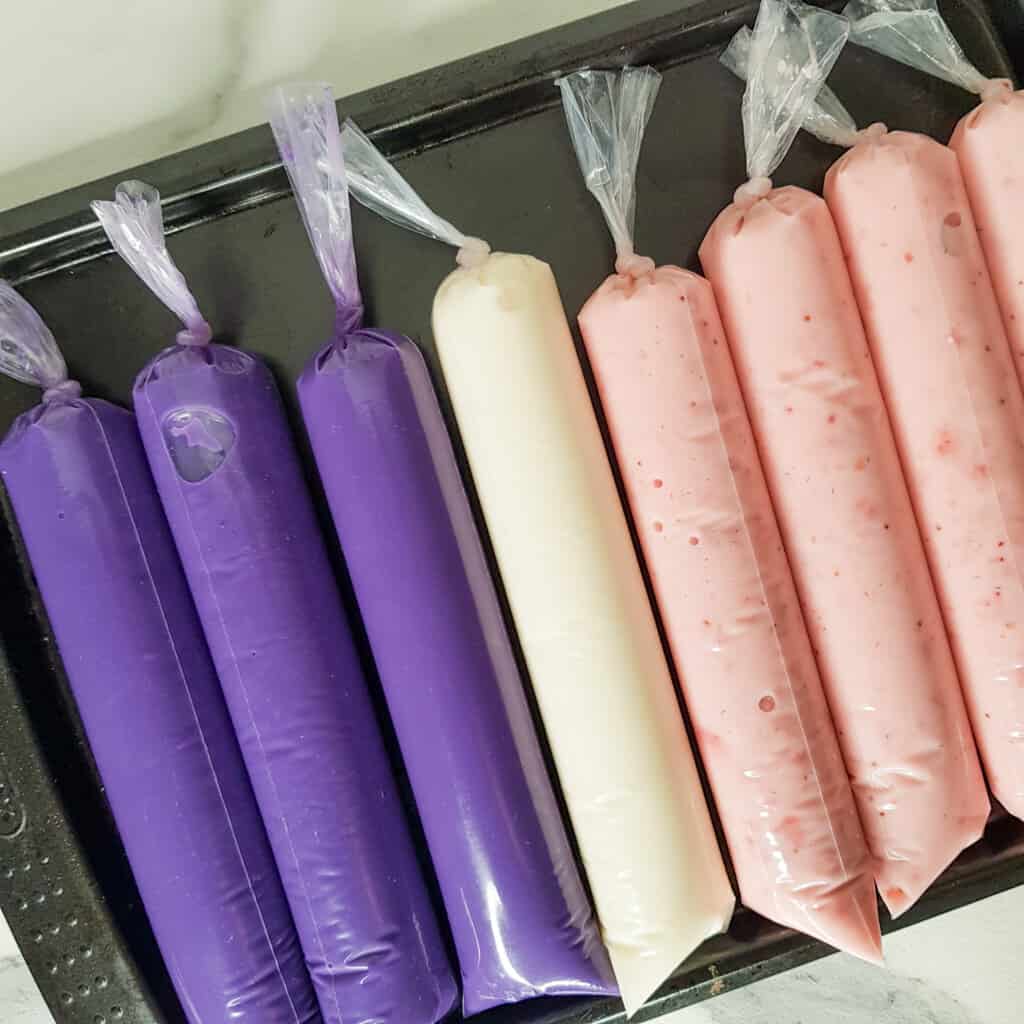
This Filipino-style ice candy recipe made with condensed milk makes a creamy base for all types of flavors. It's a flexible recipe for someone to experiment with different types of milky ice pop flavors. I made strawberry, ube, and (one!) vanilla.

Jump to:
As someone who is Filipino, a love for sweet desserts is in my blood and I'm fond of making Filipino-inspired desserts such as creamy maja blanca and ube pot de creme. I'm excited to finally try making my version of these homemade ice pops!
What is Ice Candy?
This sweet treat is a popular summer snack in the Philippines made by freezing fruit juice in narrow plastic bags. They come in many flavors: strawberry, ube (purple yam), mango, buko (young coconut), avocado, and more!
The most popular types are creamy ice candies, usually made with evaporated milk, cream, or coconut milk. They are halfway between ice cream and juice pops with a smooth, milky consistency along with icy bites to keep you cool.
Ingredients
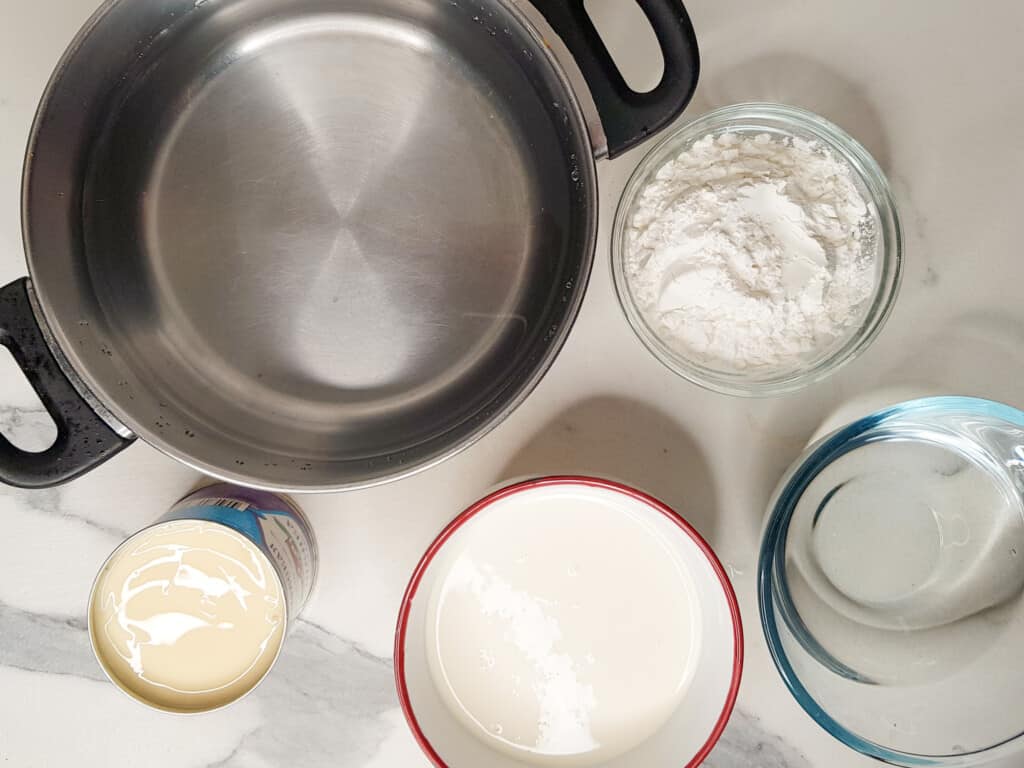
You will need the following items for a creamy ice candy base. The recipe card below also tells what you need for the ube, vanilla, and strawberry flavors!
- Water
- Cornstarch
- Evaporated Milk or Cream
- Check the substitutes below for what I used and other options if you don't have evaporated milk in your area.
- Condensed Milk
- Granulated Sugar
Substitutes
- Evaporated Milk: Use heavy cream or whole milk as alternative dairy. Heavy cream will make it more creamy and whole milk will do the opposite. Another great option is coconut milk.
- Cornstarch: Tapioca starch and cassava starch work just as well as cornstarch. Mix them with water to avoid clumps in your pot.
- Sugar: You can use any sweetener you'd like here, as long as it blends with the base mixture as it thickens.
Special Equipment You'll Need
Since you are making ice pops, you will need some items that you probably don't just have lying around in the kitchen.
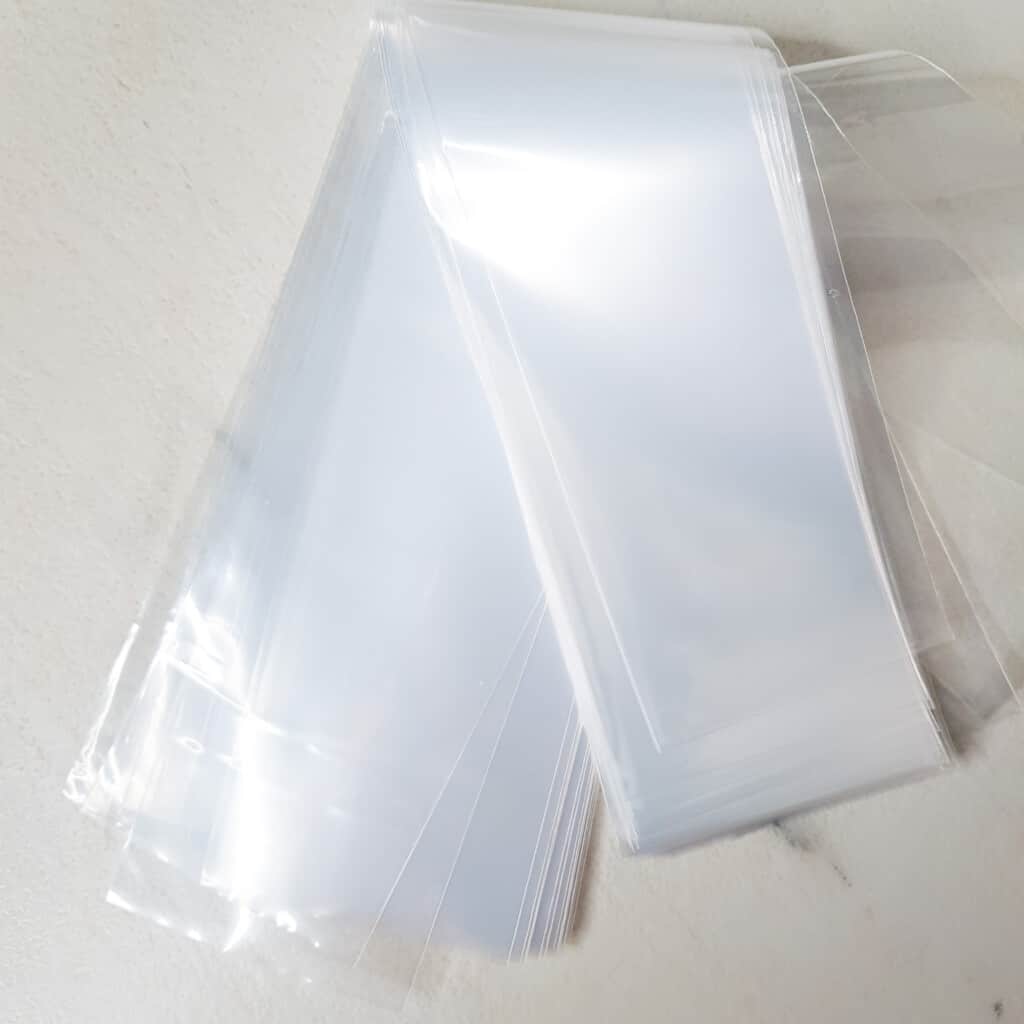

- Ice Candy Plastic Bags: These are listed on Amazon as popsicle bags. You will want to get the pack with the size 2 inches by 12 inches.
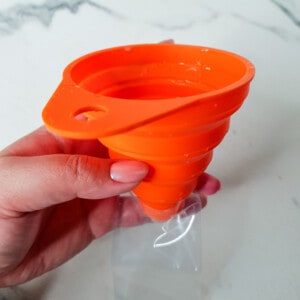
- Funnel: You will need a funnel with a big enough hole to allow the thickened mixture to flow through into each bag.
Recipe Tips
- Be Patient: Since you will cook the filling before freezing the pops, you need to keep the mixture smooth. To do that, keep the fire on low heat as you continuously stir to ensure that you thicken everything evenly.
- Adding Sugar: I have a suggested amount of sugar in the recipe card below, but you may want to customize this. Add the sugar one tablespoon at a time and taste test the mixture until you get a sweet flavor you enjoy. When the pops freeze, they will taste the same as the liquid version.
- Prepare Your Workspace: Dedicate and ready an area where you can assemble the popsicles while the mixture cools. That way, you can work efficiently without making too much of a mess. Yes, it can get messy!
- Practice Tying: Before you start on this creamy Filipino ice candy recipe, I suggest practicing how to tie the ends of the popsicle bag. Once filled, the bags should be taut and upright when tied. It's an art, but this ice candy knot-tying tutorial is a helpful start!
How to Make Ice Candy
You will cook the filling before flavoring them while maintaining a thick and loose custard-like consistency. Below is a quick preview of what to do:
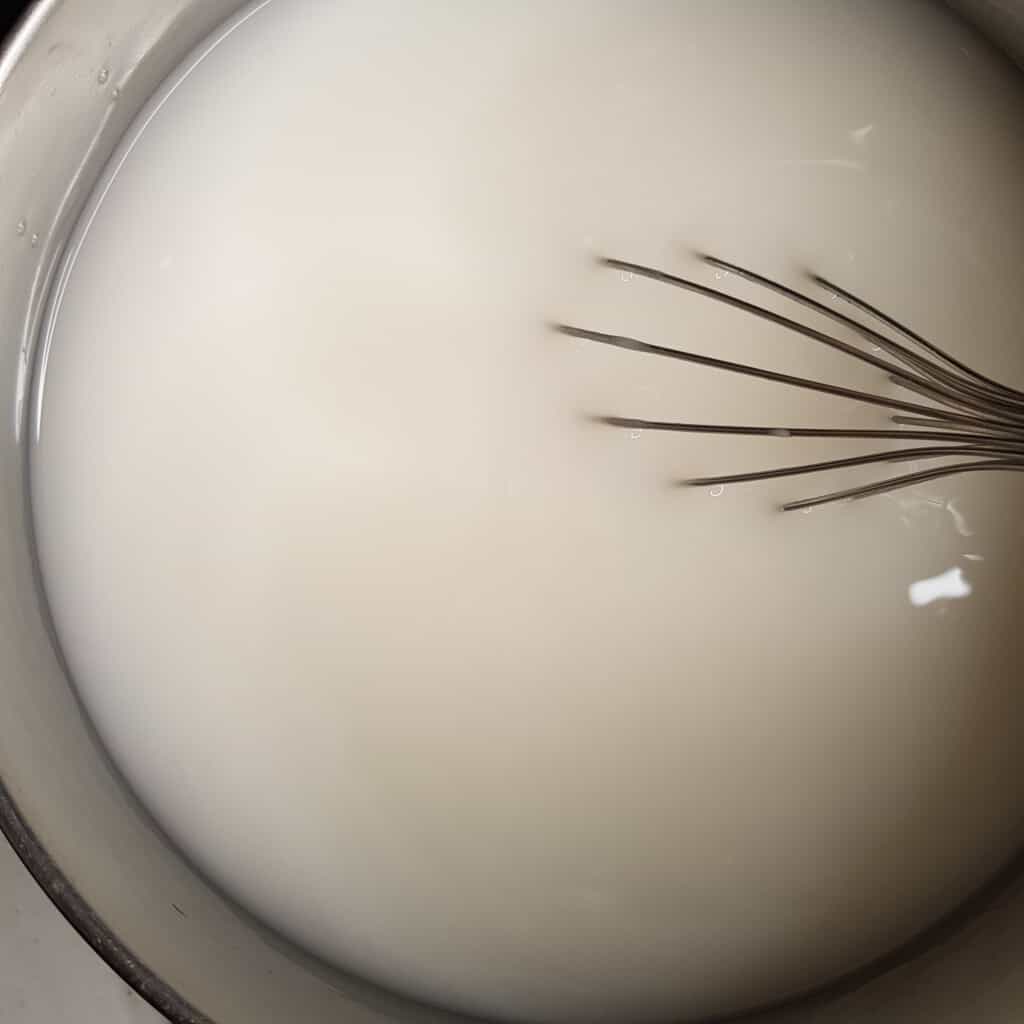
- Mix cornstarch, water, and condensed milk together.
- Boil together until the mixture has a thick soupy consistency.
- Add flavoring and additional ingredients.
- Cool the filling.
- Assemble the ice candies.
- Freeze the ice candies overnight.
It doesn't sound too bad, eh? The hardest part will be assembling them. Funnels are fussy and sometimes don't play nice! Plus, you need to keep the bag taut as you tie a knot at the ends of each pop.
Variations
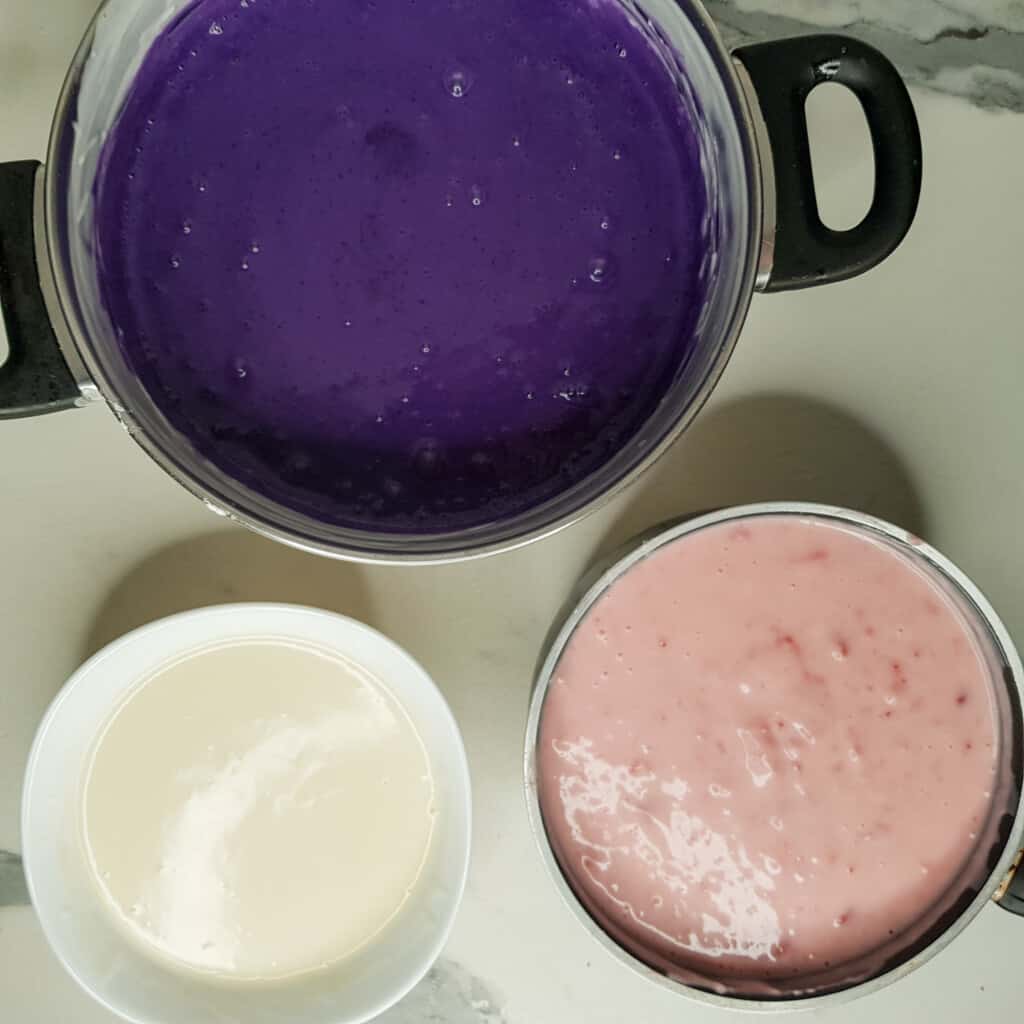
You can split the ice candy base in different containers and add additional ingredients to each mix. I don't specify exactly how much of each flavor to add because this recipe is meant to be flexible for you! So taste test as you go along to make sure the flavor is how you want it to taste.
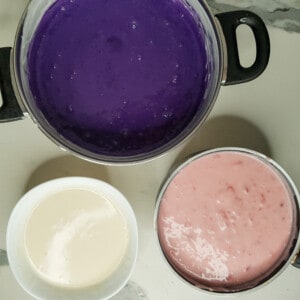
These are the variations of ice candies I made (included in the recipe card):
- Strawberry: Add some mashed strawberries to the thickened cream and heat the pot a bit more to combine the flavors and integrate the fruit.
- Ube: I used a few drops of ube extract and mixed everything thoroughly to keep the consistency smooth. If I were to make this again (in a future post!), I would use coconut milk instead of cream for a more pronounced ube flavor.
- Vanilla: I think vanilla gets often overlooked because it can be boring, but adding a few drops of vanilla extract to the ice candy base elevates the cream flavor!
- Other Fruits and Flavors:
- Make this recipe your own by adding mashed fruit that plays well with cream such as avocado, mango, passion fruit, jackfruit, pineapple - anything you desire!
- I encourage you to get creative and weird - I've seen milk and cornflakes, halo-halo, cheese, and corn fillings.
The magic of Filipino ice candy is that all you need is a versatile base filling to take on whatever flavor you want to create!
Frequently Asked Questions
You can call ice candy a dessert, but it is also considered a snack on hot days in the Philippines. Ice candies are street food made for walking and eating.
If they aren't gobbled up within days, they can sit in the freezer for up to one month.
Creamy Filipino-Style Ice Candy Recipe
Disclosure
The equipment and ingredients sections contain affiliate links to products I love to use as well as items that I personally believe make this recipe the best version of itself.
Ingredients
Creamy Ice Candy Base
- 1 cup cornstarch
- 8 cups water
- 1½ cups evaporated milk optional: heavy cream
- 1 cup condensed milk
- ½ cup granulated sugar
Strawberry
- mashed strawberries
- lemon juice
Ube
Vanilla
Instructions
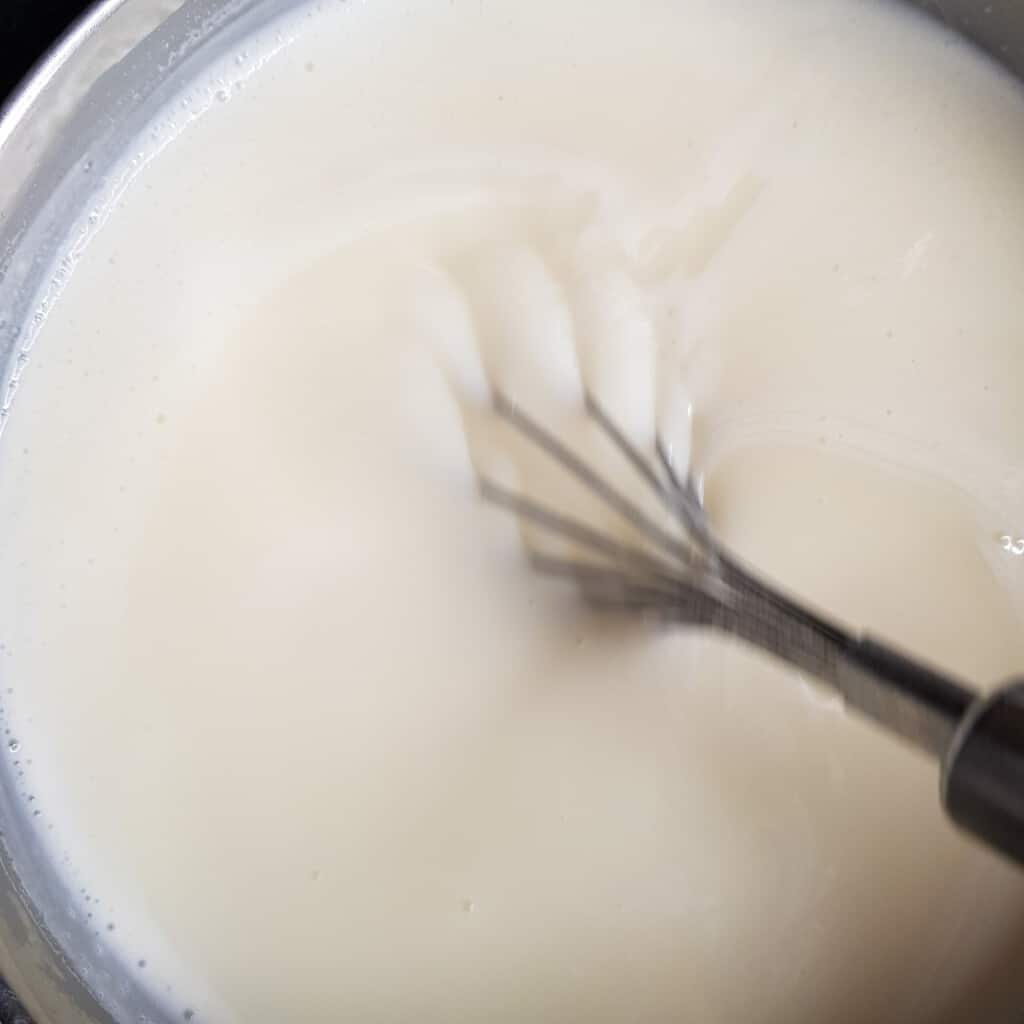
Make the Base
- In a pot mix the cornstarch with water and the condensed milk until there are no lumps left.
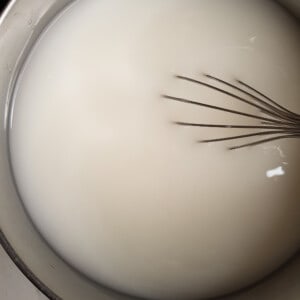
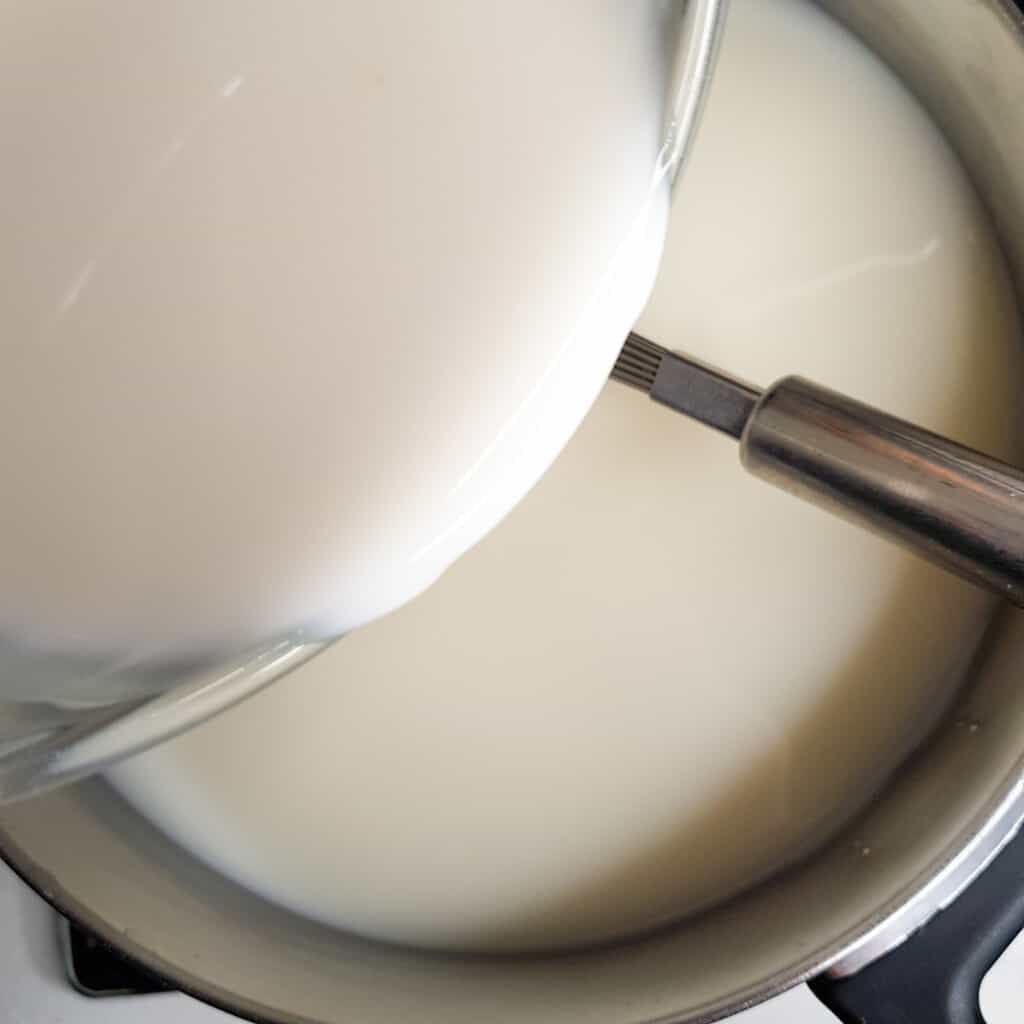
- Slowly stir in the evaporated milk (or heavy cream) until everything is blended well.
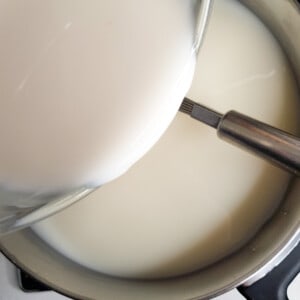
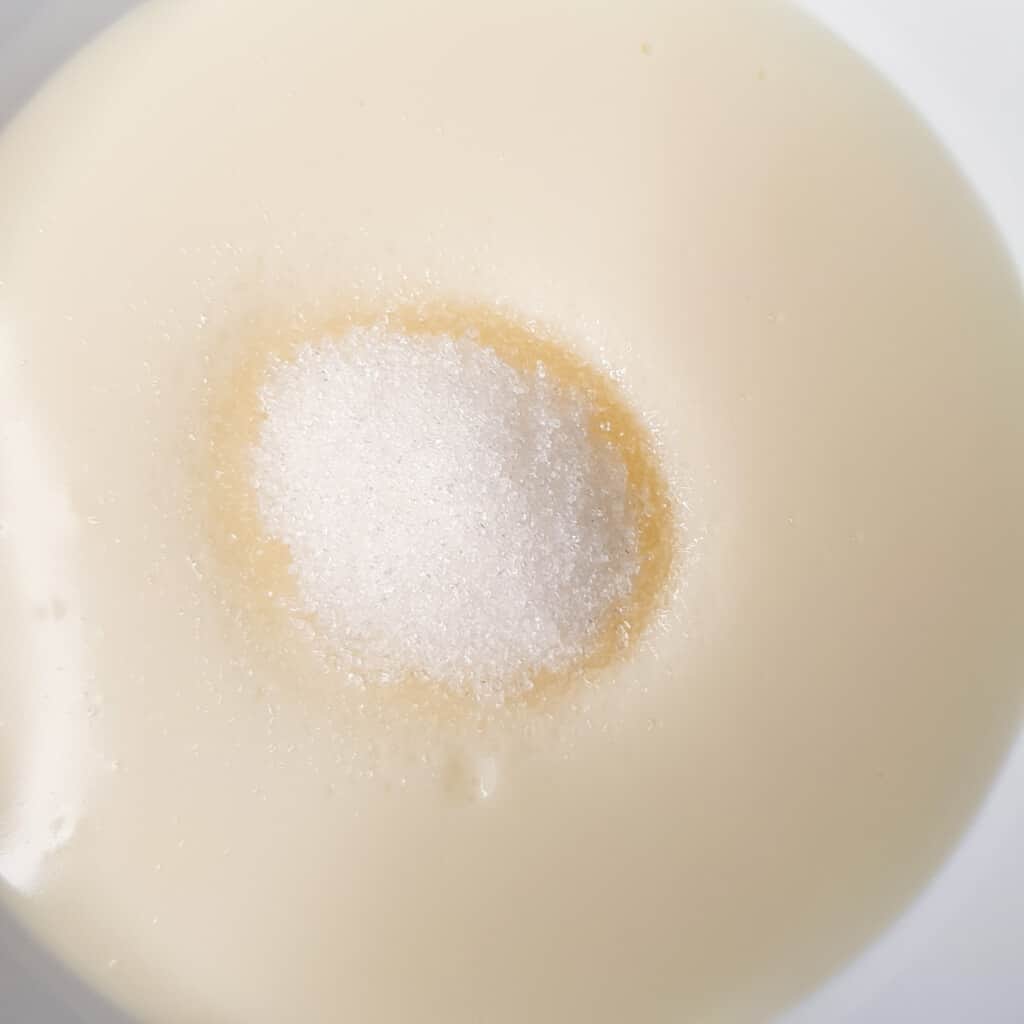
- Place the pot on medium low heat and begin stirring as it thickens. Keep stirring to avoid clumps as the mixture thickens. Stop when the mixture has the consistency of a loose custard. Remove from the heat and add the sugar a tablespoon at a time until you get your desired sweetness. It may be less or more than the ingredient measurement above.

- Making Different Flavors: Split the mixture into different containers and make the flavors that you would like. Strawberry: Mash some strawberries (it can however much you want) and add a bit of lemon juice. Taste test to see if it needs more sugar or strawbery flavor. If the mixture gets too thin, place the mixture on low medium heat to thicken again.Ube: Add a few drops of ube extract and mix very well. Taste test to see if you want to add more ube extract. Vanilla: Add a few drops of vanilla extract and mix until the mixture is white again. Taste test to see if you need to add more extract.Set the mixture aside to cool.
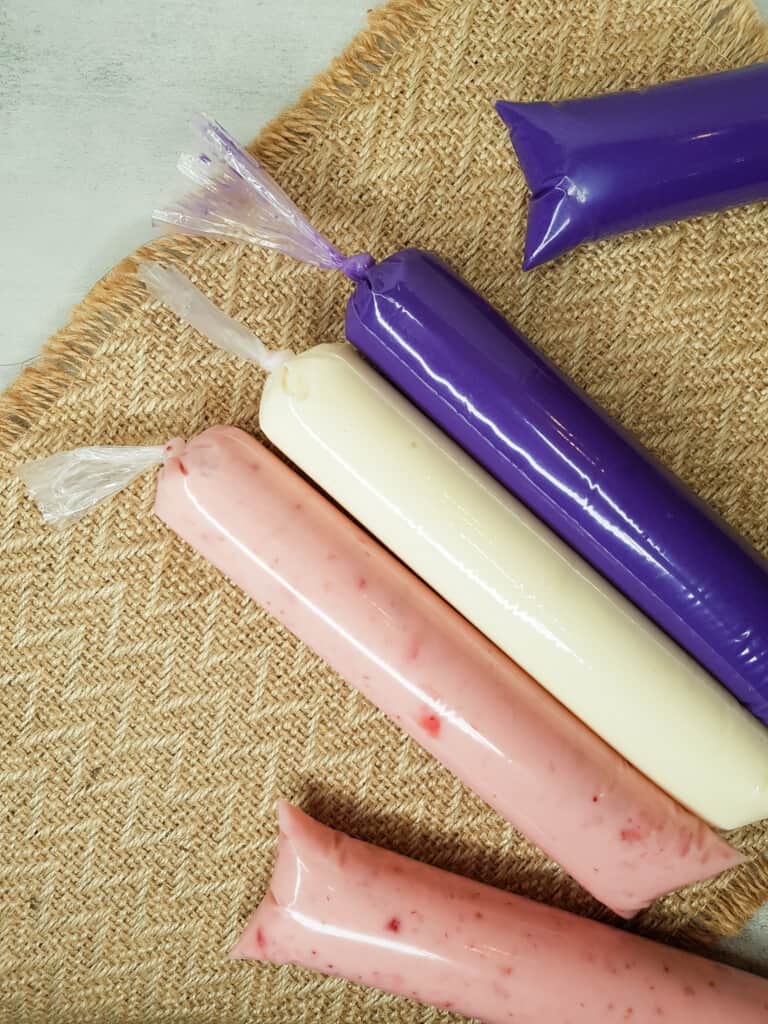
Assemble
- Take a plastic sleeve and open the end. Place the funnel inside the opening and hold it tight enough so the two pieces do not separate.
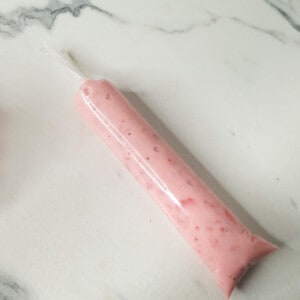
- Add about 1.25 cups of the mixture to the plastic sleeve.
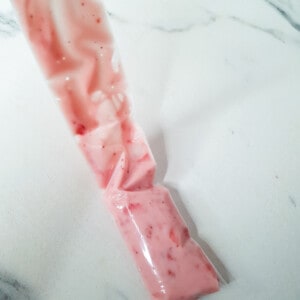
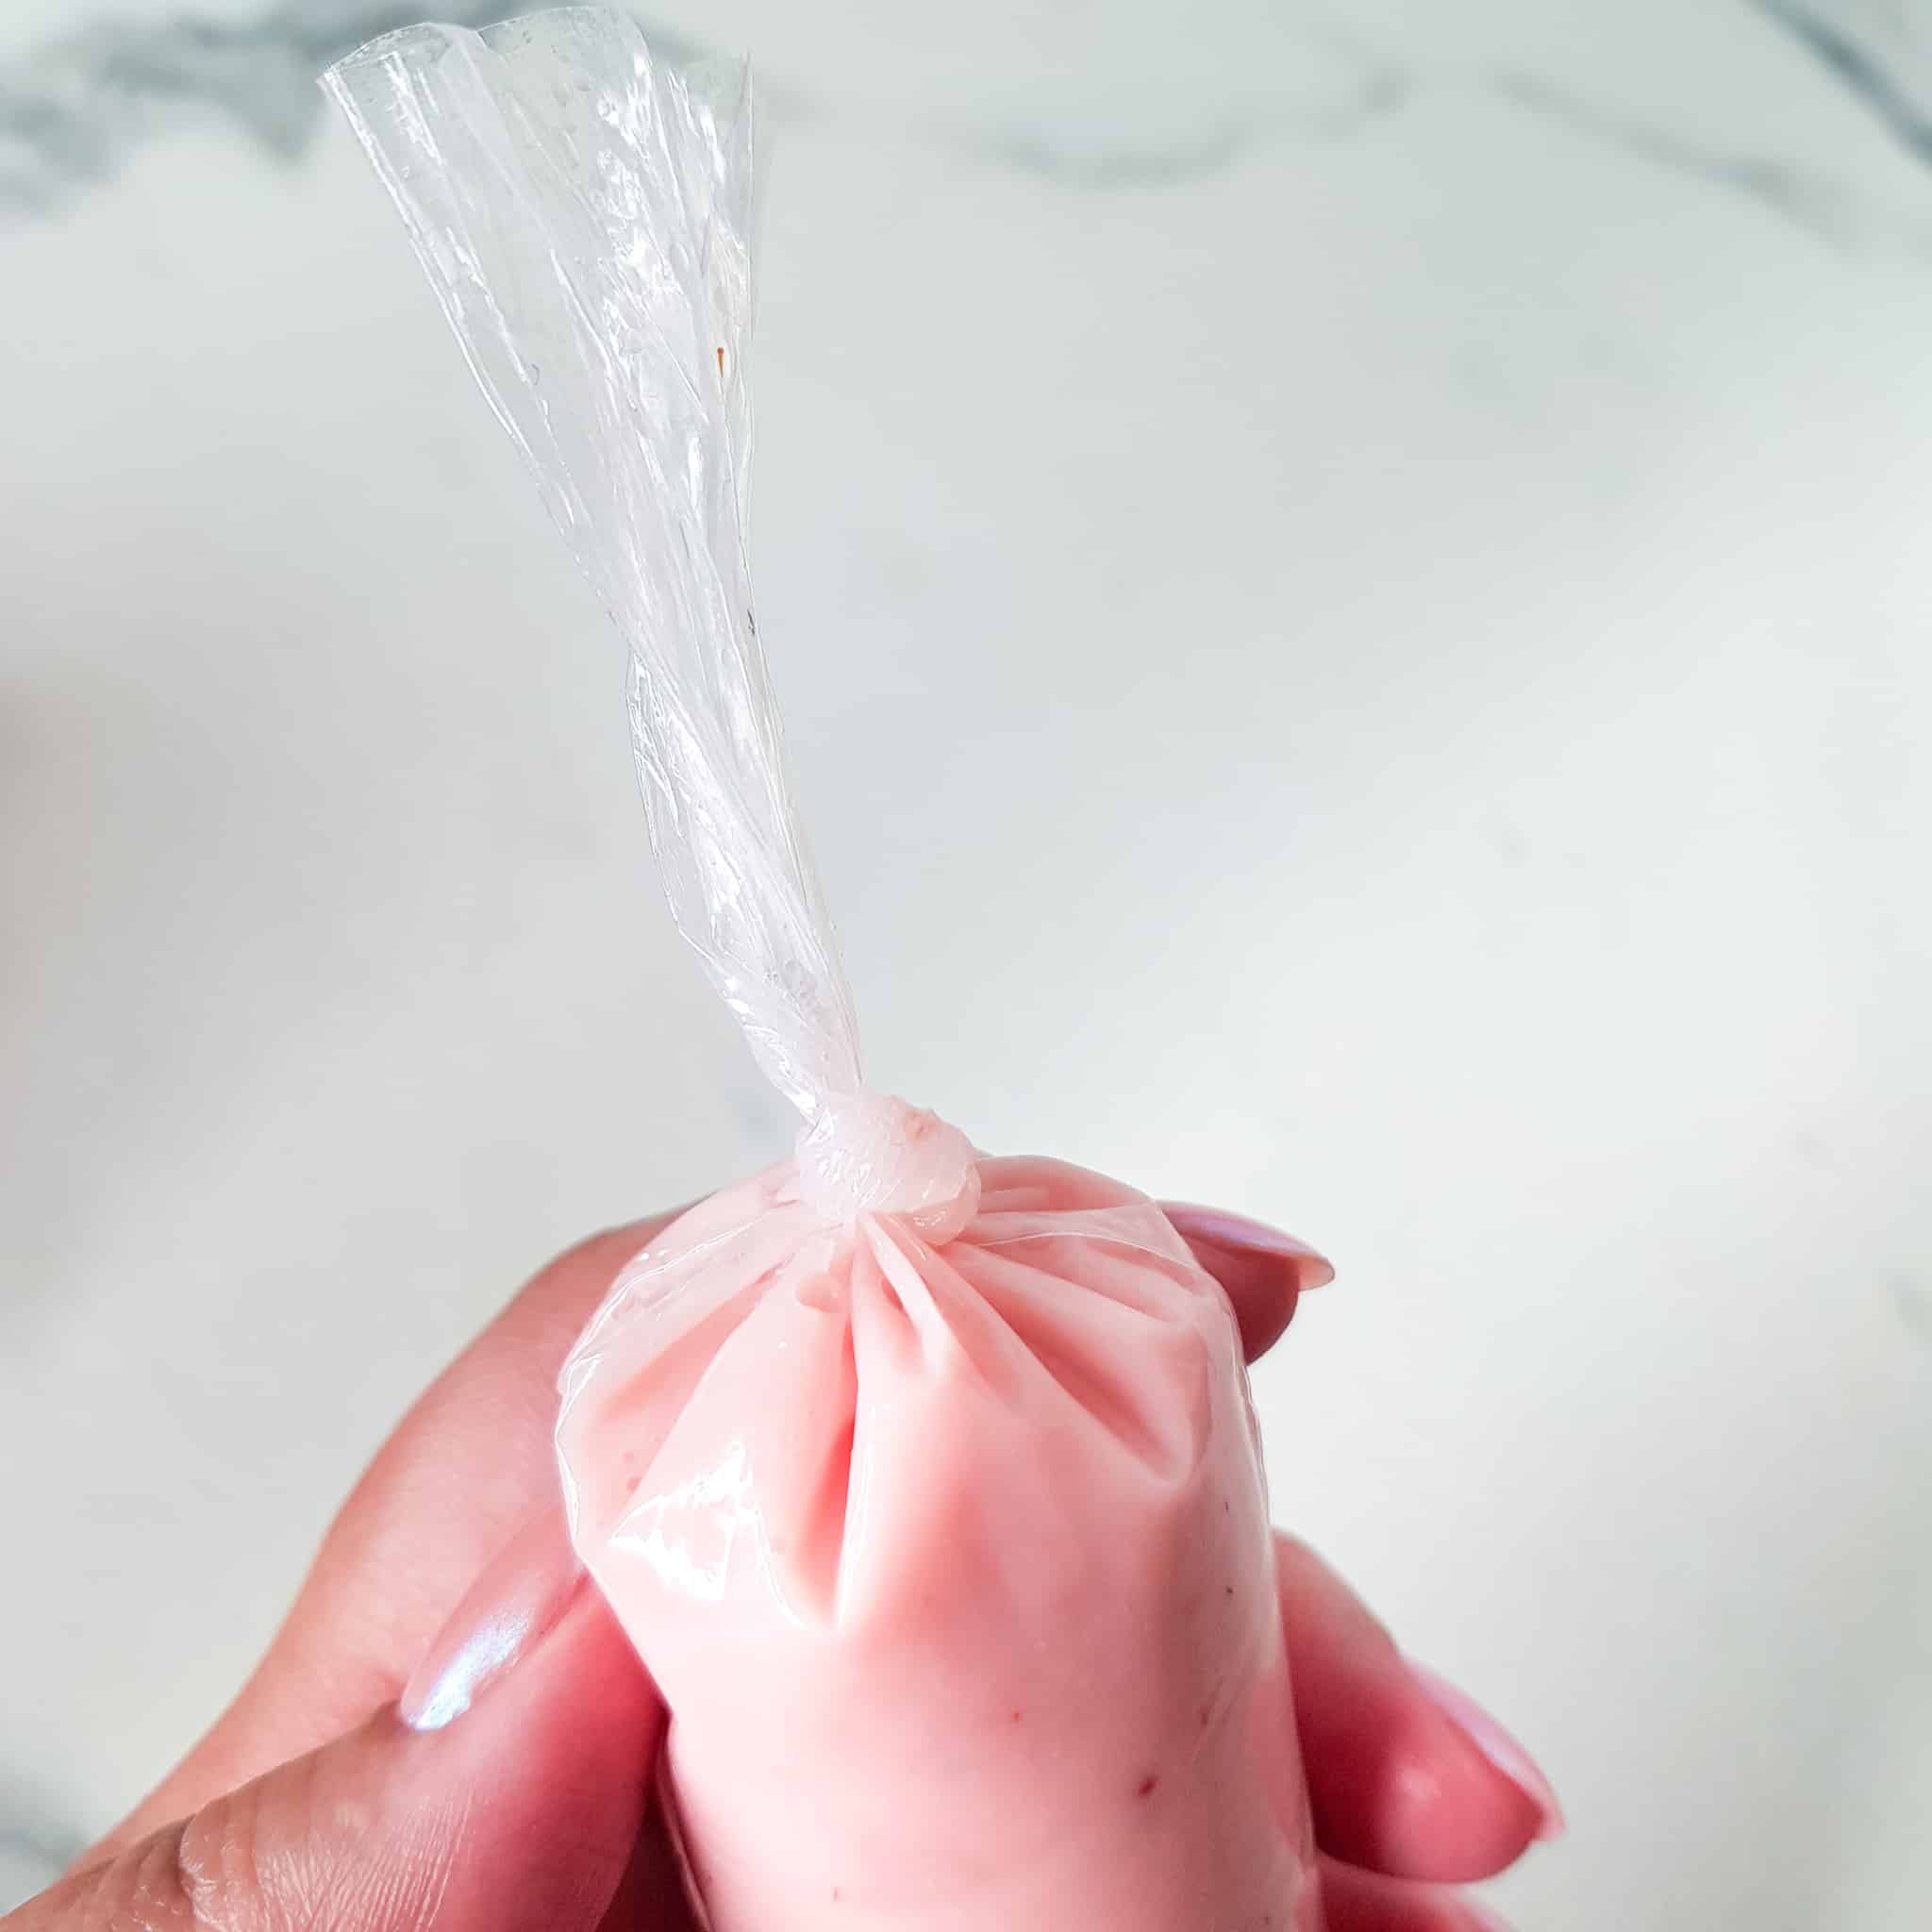
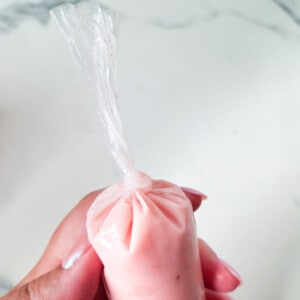
- Once filled, pinch the end where the liquid ends close to the opening to make the popsicle sleeve taut.
- Twist the end and tie a knot close to where you pinched the bag.
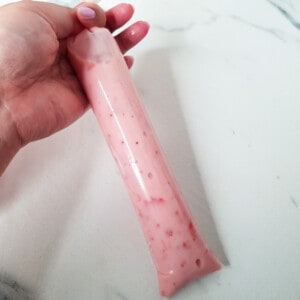
- The ice candy should be taut and should not bend when you hold it upright or vertically.
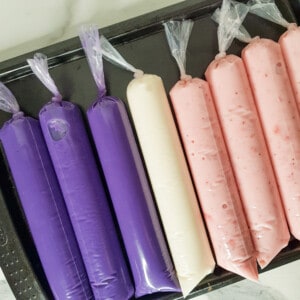
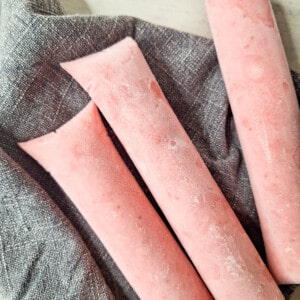
- Place the finished ice candies on a baking sheet to freeze overnight.
- Serve once they are frozen and hard all the way through.
Nutrition
Have You Tried This Recipe?
Simply rate the recipe by clicking on the ⭐️s on the recipe card. Have something to say? Please leave me a comment down below telling me what you think of this recipe.
Bonus: Let me and other readers know what you did to make this recipe your own - 💫 let's inspire each other!
Also, follow me on Instagram [@seesfoodwilltravel] and send me a DM with a picture of what you made. I would love to share and celebrate YOUR creation with our budding community 💞
Check out Sees Food, Will Travel on Pinterest and Facebook for more delicious updates.


Masaite says
What to use instead of condensed milk and evaporated milk
Joanne says
Hi Masaite, if you do not have these ingredients, you can make them at home (like I have).
These links from Bigger, Bolder, Baking will help you - condensed milk and evaporated milk
The ingredients you will need are sugar and lots of milk. Good luck!
Naomi says
Hi, The recipe doesn't mention when to add the condensed milk. I assume it goes in with the evaporated milk? Thank you!
Joanne says
Thanks for catching that Naomi! I had it in the blog post but not the recipe card 🤦🏻♀️ The condensed milk goes in with the cornstarch and water first.
Patty says
Hello, I've not heard or know of anyone who uses corn starch in their Iced Candy mix. 1 cup seems like a lot. What is the purpose? Doesn't it alter the taste? Can it be omitted without disturbing the integrity of the quality?
Thank you@
Joanne says
Hi Patty, it can be omitted but without the same soft texture. The cornstarch is used here to produce a pudding-like texture and the 1 cup cornstarch to 8 cups liquid is a ratio that is used in pudding recipes. I hope this helps clarify it!
Pia says
Hi, is this recipe suitable for a chilled drink? I'm unable to freeze them now, but the taste is so addictive, I'm gonna try to make it as a drink. The only concern is the corn starch. Will it affect the taste since it won't be frozen?
Joanne says
Hi Pia, great question! I know what you mean - that creamy condensed milk taste is hard to put down! The cornstarch is used to thicken the liquid close to a pudding consistency, and that's how you get a creamy soft texture when it is frozen. I would leave out the cornstarch if you just want to make a drink from it. If you like the thickened texture, you can still refrigerate it, but it may continue to thicken past something you can drink in the fridge - more like a loose pudding. I hope this helps!