
I adore pie. On my birthdays, my close friends get together to decide on what pie to give me as a substitute for cake. Not that I hate cake, it's just that I really love pie. One pie that holds a special place in my heart is the chocolate haupia pie from Hawaii.
Growing up in Oahu, Hawaii, you could have called me a “townie kid.” I did not spend much time at the beach or in the sun. However, I did hang out in cafes, malls, and libraries with my friends. I took for granted an abundance of local-style food ranging from spam musubi to beef stew and chantilly puffs. If you ever meet someone who grew up in the islands, ask them about the local food and they will always have something good to say.
Jump to:
I developed my love for food in high school, where I spent my paychecks from part-time jobs on meals at Anna Miller’s. Their chocolate haupia pie stole my heart from the first bite. As did their famous fresh strawberry pie which I recreated at home. Unfortunately, Anna Miller’s and Ted’s Bakery in Maui keep their recipes locked up, so I’ve been tweaking mine for years, pursuing that nostalgic taste while living abroad.
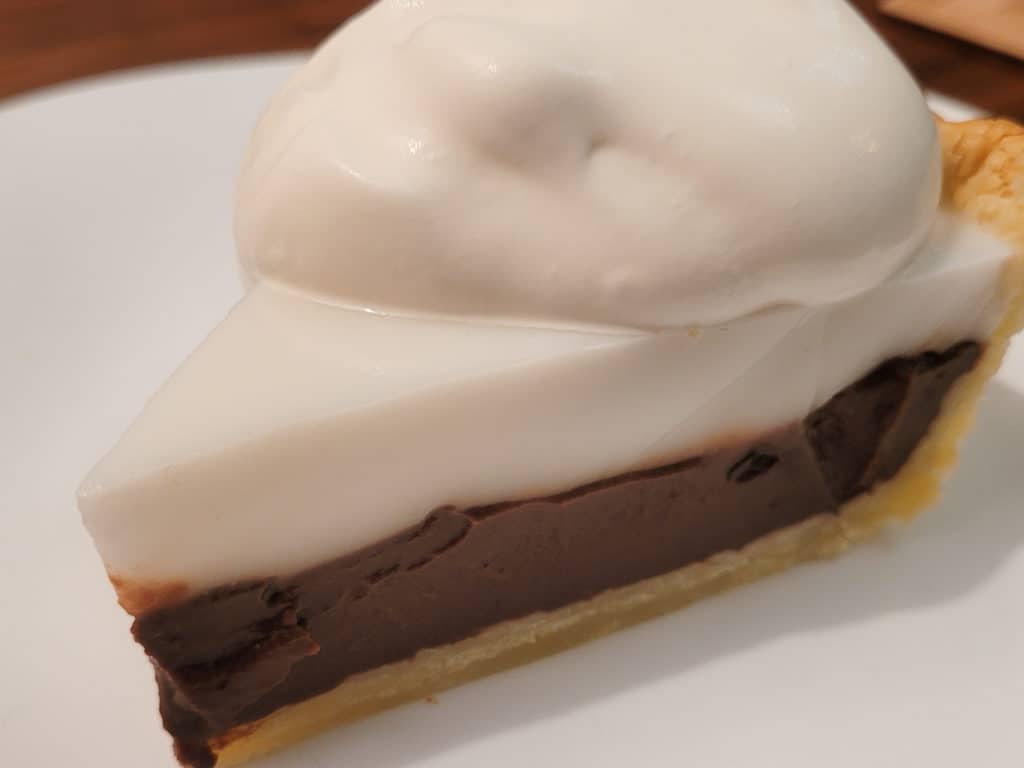
What is Haupia Pie?
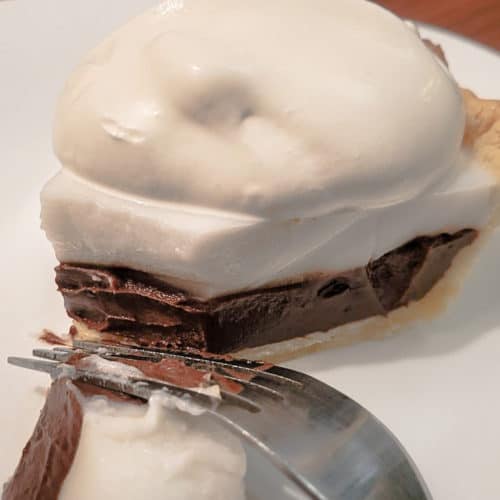
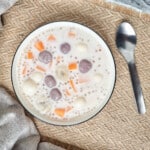
Haupia is a flan-like Hawaiian dessert made with just three ingredients: coconut cream, sugar, and cornstarch. You can also think of haupia as a thick coconut pudding. It’s simple to make, but the layers of chocolate pudding mixed with haupia, plain haupia, and whipped cream create a delicate balance of rich and light flavors.
Ingredients
In my experience, these ingredients are readily available in major cities around the world. You don't need to go out of your way to source them.
- Coconut Milk: These usually come in cans. You will have to shake it before using to loosen the liquid inside. Make sure you look at the labels and choose the one that says "milk," not "cream."
- Whole Milk: To achieve a creamy consistency you will want to go full fat with the milk! But you can also choose to use low-fat or non-fat milk.
- Dark and Milk Chocolate: When choosing your chocolate, make sure that they are high quality chocolate that do not contain additives and additional ingredients such as fruits or nuts.
- Granulated Sugar: We need sugar to sweeten the coconut pudding, also known as haupia. Do not use as much sugar if you are adding more milk chocolate.
- Cornstarch with Water: The cornstarch slurry acts as a thickener for the coconut cream which will later help set the pie filling in the fridge.
- Pie Crust: You can buy pre-made pie crust or make your own with this recommended pie crust recipe. It's important to pre-bake it to avoid a soggy bottom.
Some Tips Before Starting
Tip #1 Care About Your Crust
When it comes to pie crusts, I believe that Four & Twenty Blackbirds' all-butter pie crust is a versatile recipe that can be used in a variety of pie recipes. I let it sit for two days before blind-baking. Good things take time! But you can use whatever raw pie crust you have available. A baked pie crust will help you avoid soggy bottoms while creating a flaky contrast to the soft filling.
Tip #2 Level Up On Chocolate
I do not have a hard time finding coconut milk in any major city. However, the quality of the chocolate I use in the pie varies depending on the location. Now that I live close to Europe and have access to better quality chocolates, I would say that my version of haupia pie has only gotten better.
For the chocolate layer, you have some flexibility. Use one bar of 65% to 70% dark chocolate and one bar of milk chocolate. The chocolate must be solid, with no nuts, fruits, or other additions. To make a sweeter pie, use more milk chocolate than dark chocolate. You can also increase the sugar up to one cup, instead of the three-fourths of a cup listed in the recipe.
How to Make Chocolate Haupia Pie Filling
- Chop the dark and milk chocolate bars and place them in a bowl. Then set it aside for later use.
- In another small bowl, mix water and cornstarch until there are no lumps visible. Set the bowl next to the stovetop.
- In a saucepan, add the coconut milk, sugar, and milk. Place the saucepan on medium low heat. Allow the heat to melt the sugar while stirring, as the ingredients come together.
- Begin whisking the coconut mixture while slowly pouring in the cornstarch slurry. Keep whisking as it thickens.
- The coconut pudding is thick enough when you can make pudding ribbons with the whisk.
- Remove the saucepan from the heat and pour half of the coconut pudding into the bowl of chopped chocolate. Mix the chocolate and coconut pudding until the chocolate has been completely incorporated.
- Begin making the layers to your pie by pouring in all of the chocolate coconut pudding to the bottom of your prepared pie crust. Even out the surface with a spatula.
- Carefully add the remaining plain coconut pudding from the saucepan on top of the bottom layer. Even this out with a spatula.
- Place the pie in the fridge until the filling has set.
More Tips
- Move Fast: You have to move fast because the cornstarch can easily make the filling clumpy.
- Follow Order of Operations: Wait until the pie crust has completely cooled before pouring in the filling.
- Keep Everything Within Reach: Put the cornstarch water mixture and the bowl of chopped chocolate within a hand’s reach from the stove.
- Let the Coconut Cream Melt the Chocolate: Other recipes call for melting the chocolate in the microwave first. But if you transfer half of the hot haupia pie filling immediately to the bowl of chocolate, the heat will melt the chocolate right away. This saves you a step in the process. You will also avoid potentially burning the chocolate in the microwave.
- Split the Steps in Two Days: Putting all the elements of this pie together takes a little bit of prep time. If you choose to make your own crust, I recommend refrigerating your crust for two days. You can make haupia pie filling and assemble the pie on another day.
I promise that the effort and time are worth it. This pie will be gobbled up by your friends and family!
Chocolate Haupia Pie
Disclosure
The equipment and ingredients sections contain affiliate links to products I love to use as well as items that I personally believe make this recipe the best version of itself.
Ingredients
- 1 9-inch raw pie crust of your choice
Haupia Pie Filling
- 1 bar 70% dark chocolate (90 grams)
- 1 bar milk chocolate (90 grams)
- 1 can coconut milk (13.5 oz / 400 ml)
- 236 ml milk
- 150 grams granulated sugar
- 60 grams cornstarch
- 237 ml water
Whipped Topping
- 50 grams granulated sugar
- 355 ml heavy whipping cream
Instructions
Blind Bake Your Raw Pie Crust
- Preheat oven to 425°F/220°C
- Roll out pie crust onto pie pan
- Poke holes in the dough (don't worry, the holes shouldn't cause the pie filling to leak)
- Line the dough with aluminum foil or parchment paper
- Take some uncooked rice or pie weights and fill up the pie pan
- Put the pie crust with weights in the oven for 15 minutes
- Take out the pie crust and turn the oven temperature down to 350°F/150°C
- Remove the pie weights
- Put crust back in oven and continue to bake the pie for another 10 minutes
- Set the pie aside to cool for at least an hour
Make Your Filling
- Roughly chop the dark chocolate and milk chocolate then put in a mixing bowl, set aside
- Mix water and cornstarch until no clumps are visible and set aside
- Heat coconut milk, sugar, and milk together in a saucepan until it starts to slightly bubble
- Add the cornstarch slurry as you whisk the coconut mixture to avoid clumping
- At this point, the mixture will start getting thick fast! So continue stirring until you see soft peaks forming. As soon as that happens, turn off the heat and remove it from the stove.
- Take half of the cooked haupia pie filling and immediately add it to the bowl of chocolates
- Using a whisk mix the chocolate and haupia mix together
- Carefully layer the chocolate haupia at the bottom of the crust
- Add the white haupia gently on top of the chocolate haupia filling being careful not to mix the layers
- Refrigerate the pie for at least 8 hours until the filling has set
Have You Tried This Recipe?
Simply rate the recipe by clicking on the ⭐️s on the recipe card. Have something to say? Please leave me a comment down below telling me what you think of this recipe.
Bonus: Let me and other readers know what you did to make this recipe your own - 💫 let's inspire each other!
Also, follow me on Instagram [@seesfoodwilltravel] and send me a DM with a picture of what you made. I would love to share and celebrate YOUR creation with our budding community 💞
Check out Sees Food, Will Travel on Pinterest and Facebook for more delicious updates.

Kara says
This was such a hit when I made it for my family. I love how easy and accessible getting the ingredients were. Don't skip on blind baking the raw pie crust!
Joanne says
Thanks, Kara! Blind baking is key!