
I know I'm not the first to say it, but Portuguese food is really good. As a die-hard seafood and pastry lover, my time in Lisbon and Porto this past spring felt like heaven on earth. The country opened my eyes to soft grilled octopus, canned sardines, and of course, pastéis de nata. You can easily taste the difference between a classic Portuguese egg tart versus a Macanese Portuguese egg tart. The original version has a notable caramelized cinnamon flavor from the first bite. It is an element Macanese egg tarts can't boast. But before I go on, I must declare both types are delicious!

If you are interested in Macanese Portuguese egg tarts, check out this recipe here where you can make the matcha or traditional version. Macanese Portuguese egg tarts come with a rough pastry dough and a simple egg yolk mix made with cornstarch and milk. Traditional Portuguese egg tarts, or pastéis de nata, take a bit more effort with laminated dough that requires turning and a filling that makes up a two-step process.
Enjoy the Process
Someone in Lisbon told me homemade pastéis de nata should look and feel homemade. Whether it was just a local's opinion or not, I totally agree. So don't sweat the teeny details of this recipe. Make some delicious tarts knowing that every single one isn't going to come out perfectly.
How to Make Pastéis de Nata
This pastéis de nata recipe isn't exactly quick unless you buy pre-made pastry dough. Totally legal, and you should feel free to do so. If you are up for a challenge, go ahead and try making your own laminated dough from scratch! It does take some time, but it's worth the effort.
Make Laminated Dough
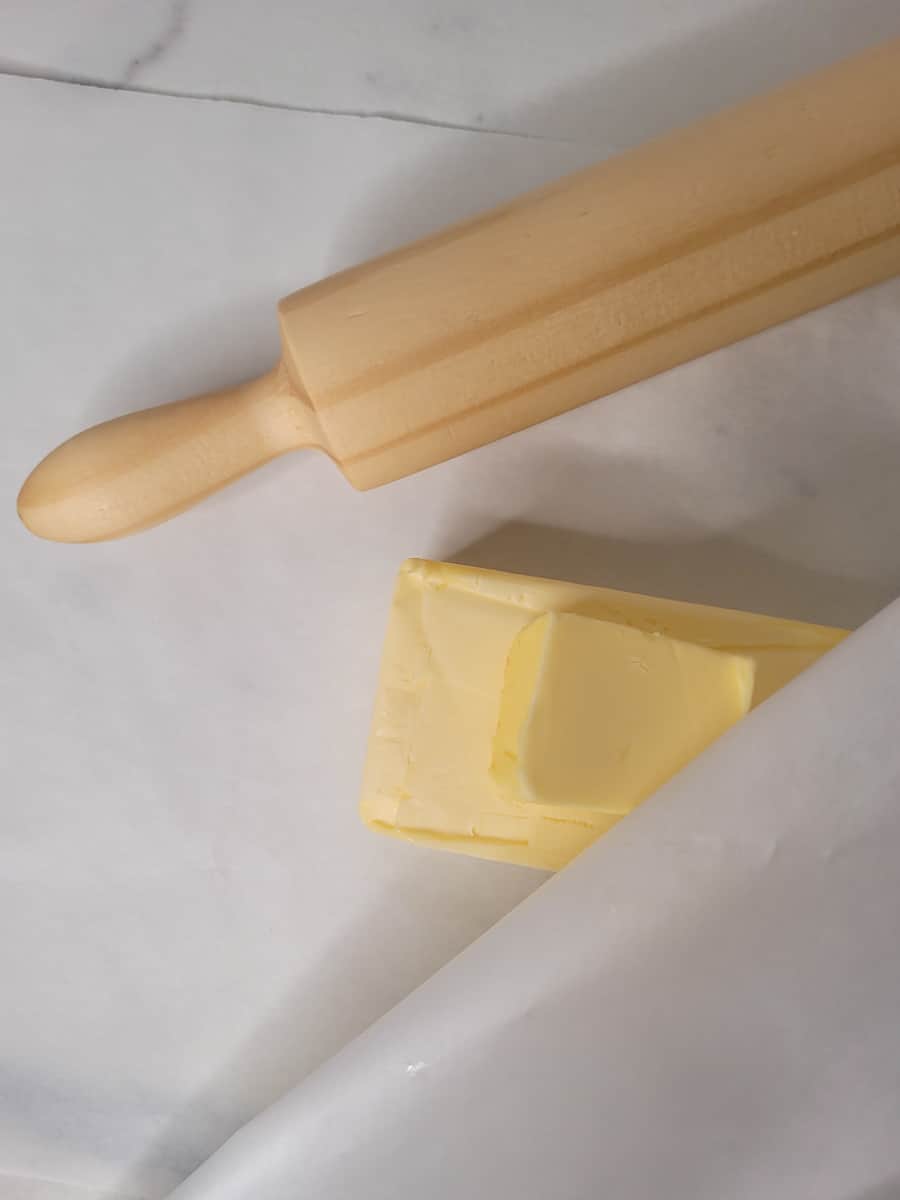
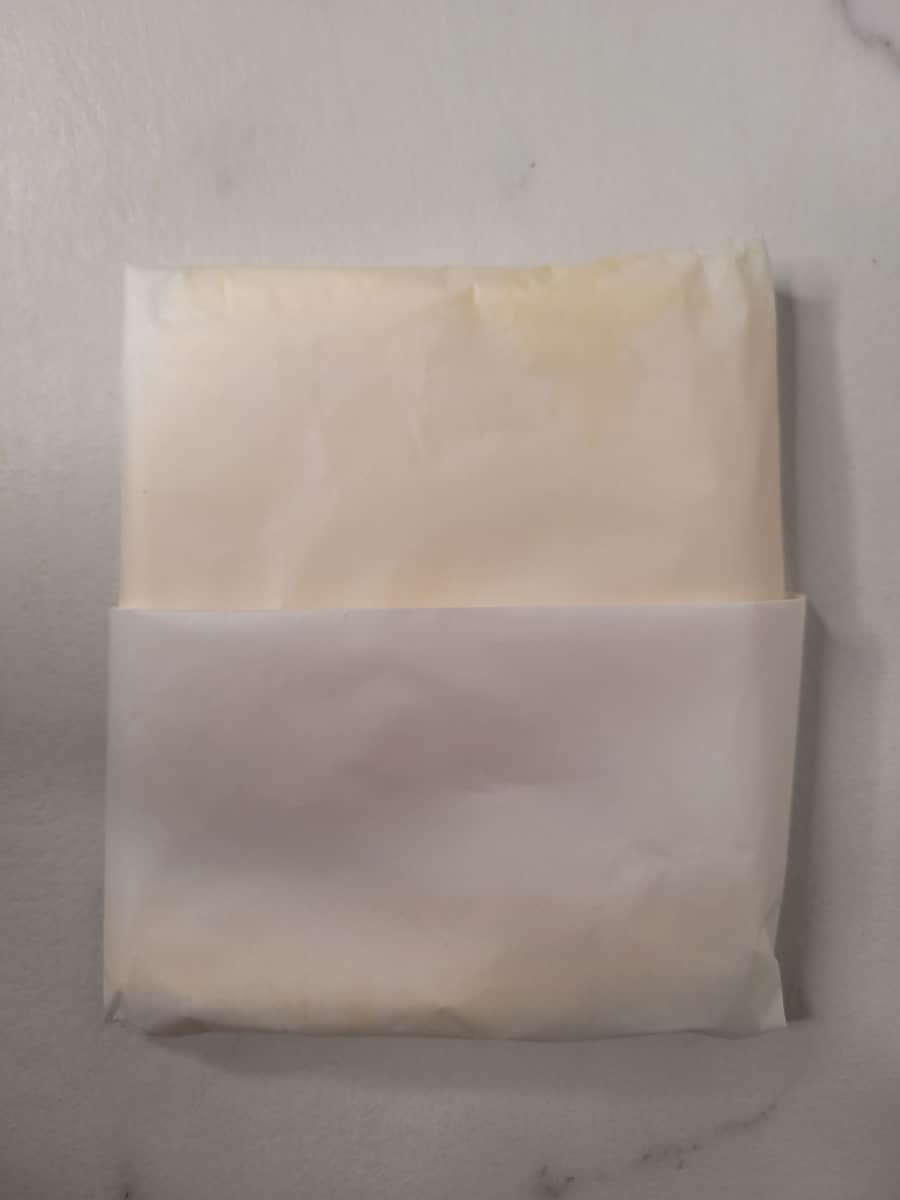
Measure out the butter and place it between two wax paper sheets. Using a rolling pin, press down on the butter as you gently roll it out to a flat 15x15 cm (6x6 in) square. Refrigerate until ready for use.
Next, add the flour and salt to a large bowl and whisk. Then make a well in the middle and add the cold water. Use an electric beater with hooks to knead the dough or mix until you get a shaggy dough.
Transfer to a flat surface and knead for five to eight minutes until the dough is smooth and you can form a ball. Cover and refrigerate for fifteen minutes.
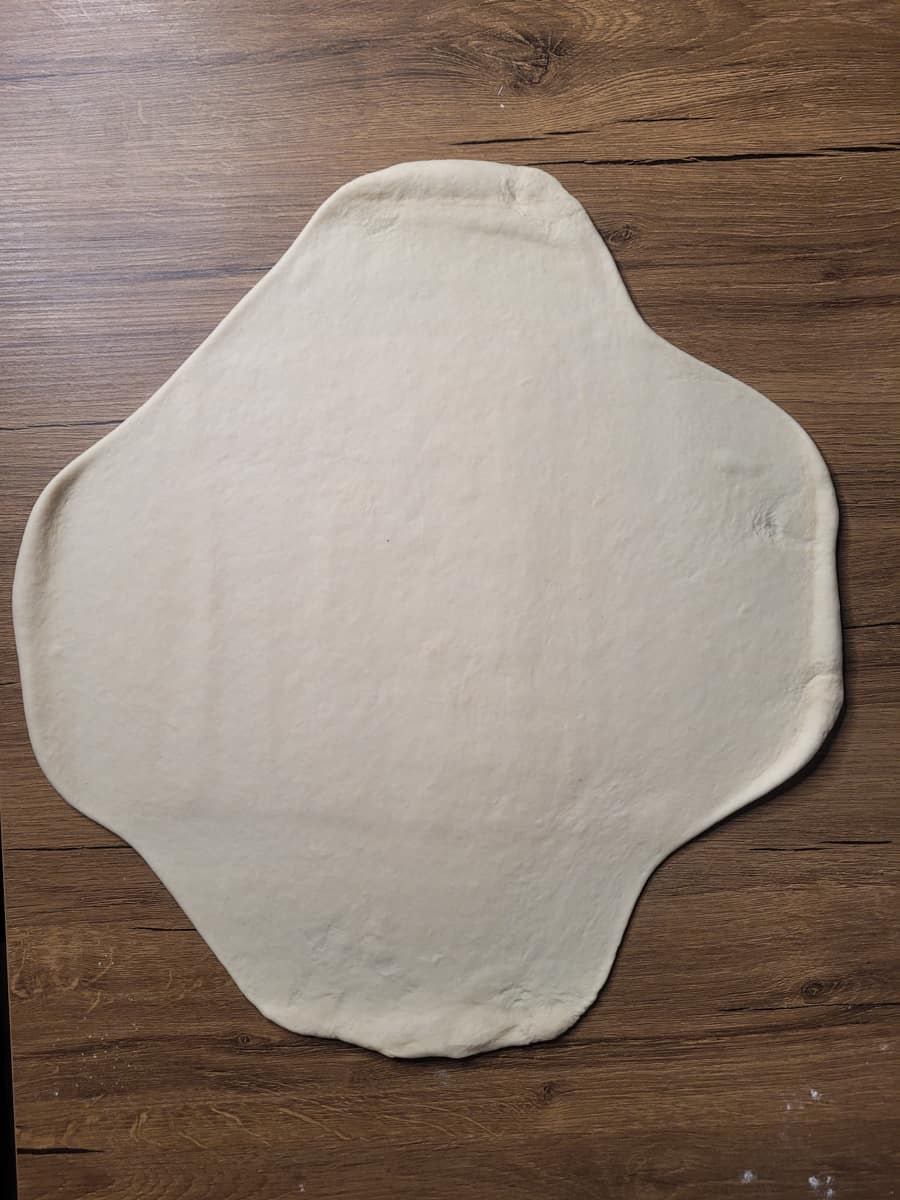
Once ready, roll out the dough and make flaps on each side with a large center for the butter slab.
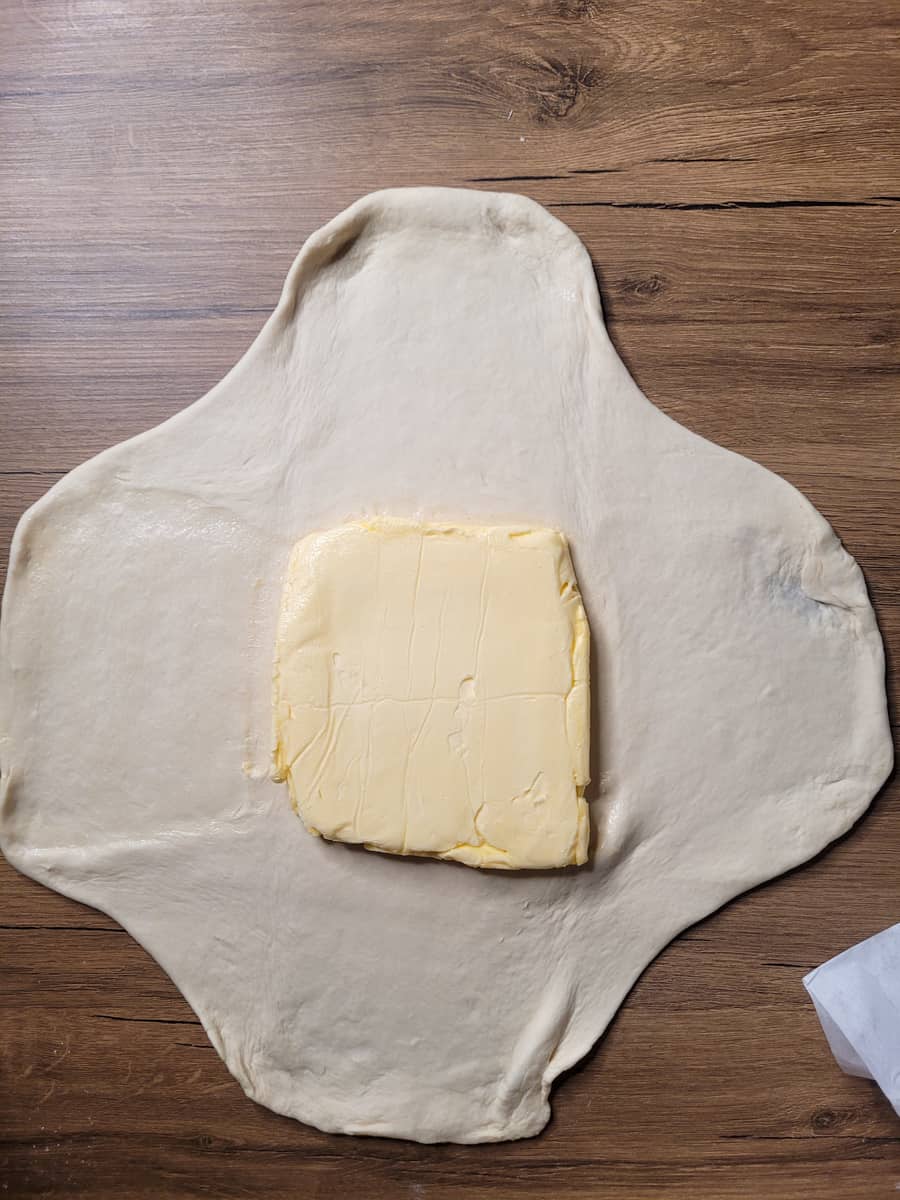
Place the butter at the center and fold the flaps over the butter. Then flip the entire piece upside down. Wrap it up and refrigerate for twenty minutes.
This is where you will start creating layers. Repeat these steps twice to make the layers.
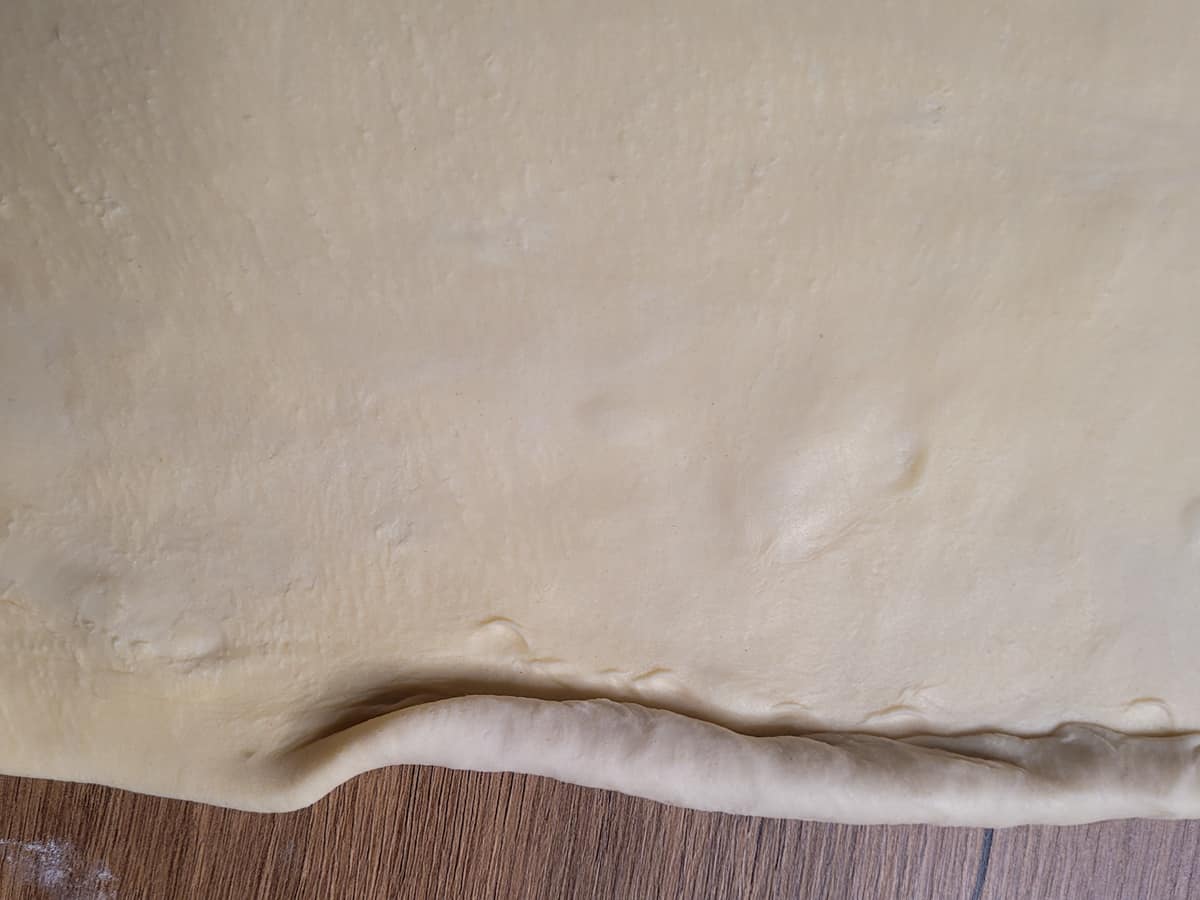
- Shape the dough into a 15x36 cm rectangle (6x14 in), and make sure the long side of the dough faces you.
- You will fold the dough into three parts. Envision the dough in three equal sections: left, middle, and right.
- First, fold the left side over the middle. Then fold the right side over the first fold.
- Then make a quarter turn of the dough to the right so the open end faces up.
Cover and refrigerate for twenty minutes before repeating the steps above one more time.`
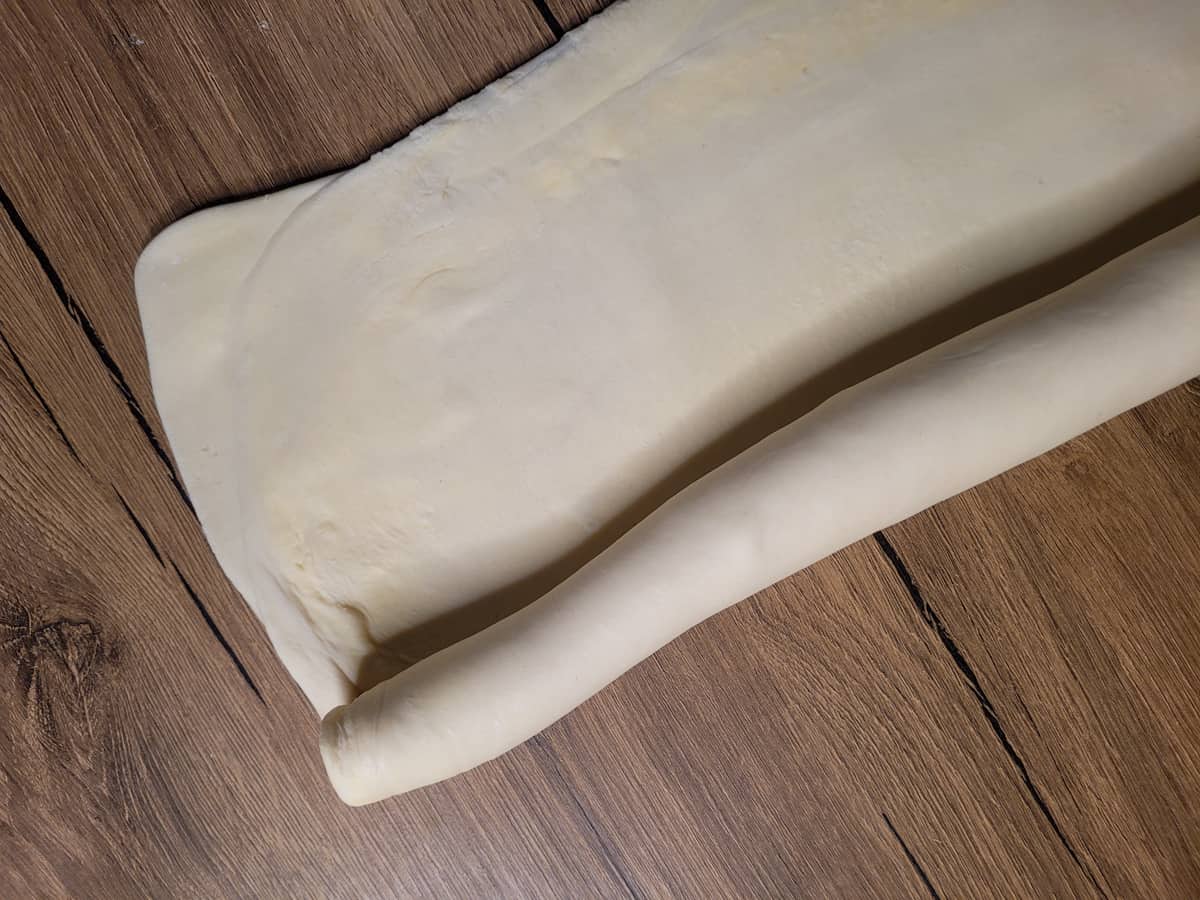
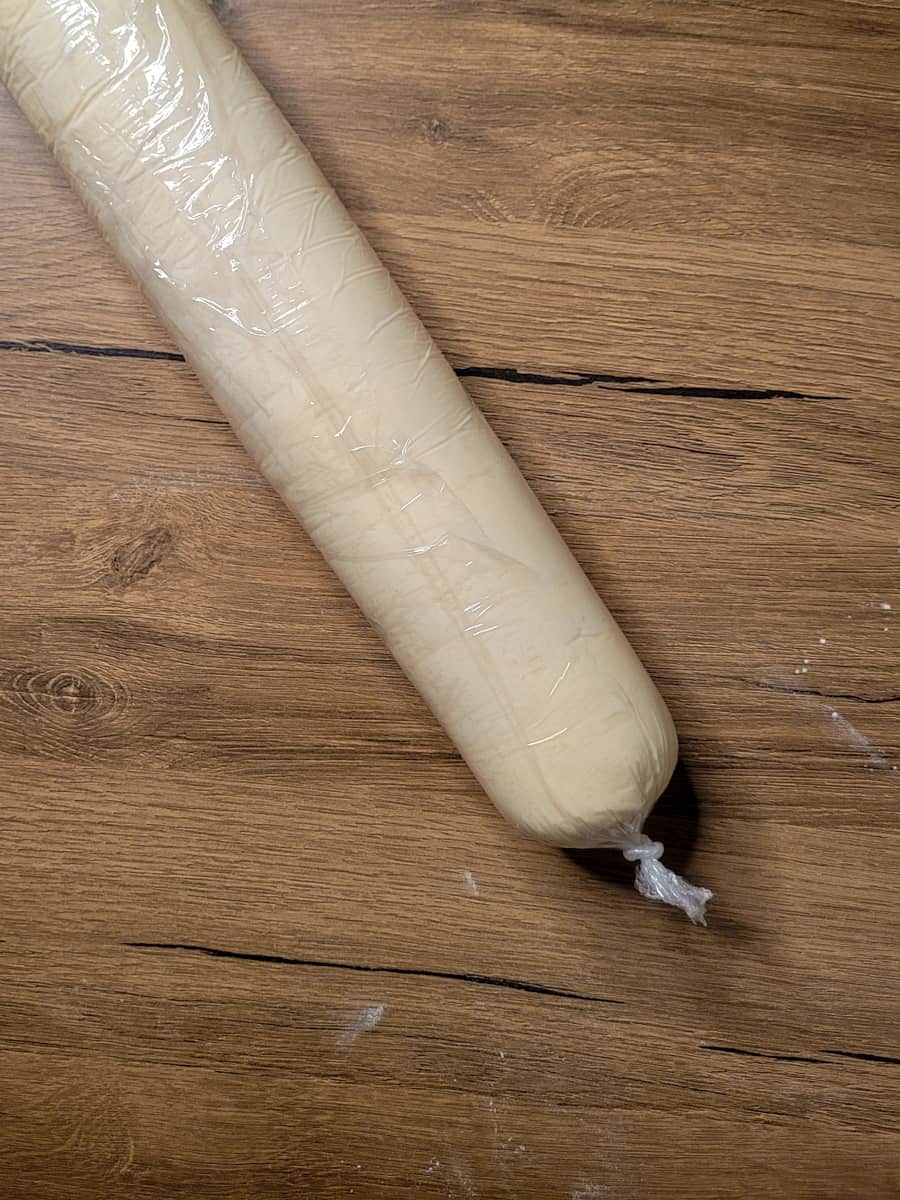
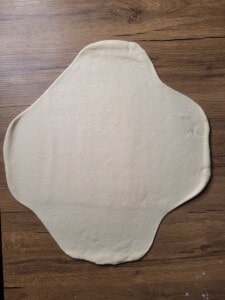
Finally, roll the dough into a 20x30 cm (8x12 in) rectangle. This time pinch the bottom of a long side to start a roll and begin carefully rolling the dough to the other long side. Cover with cling wrap and refrigerate for at least one hour before using.
Shaping Dough in Molds
Once the dough hardens through the chilling process, slice it into twelve to sixteen equal sizes depending on the size of the mold you use.
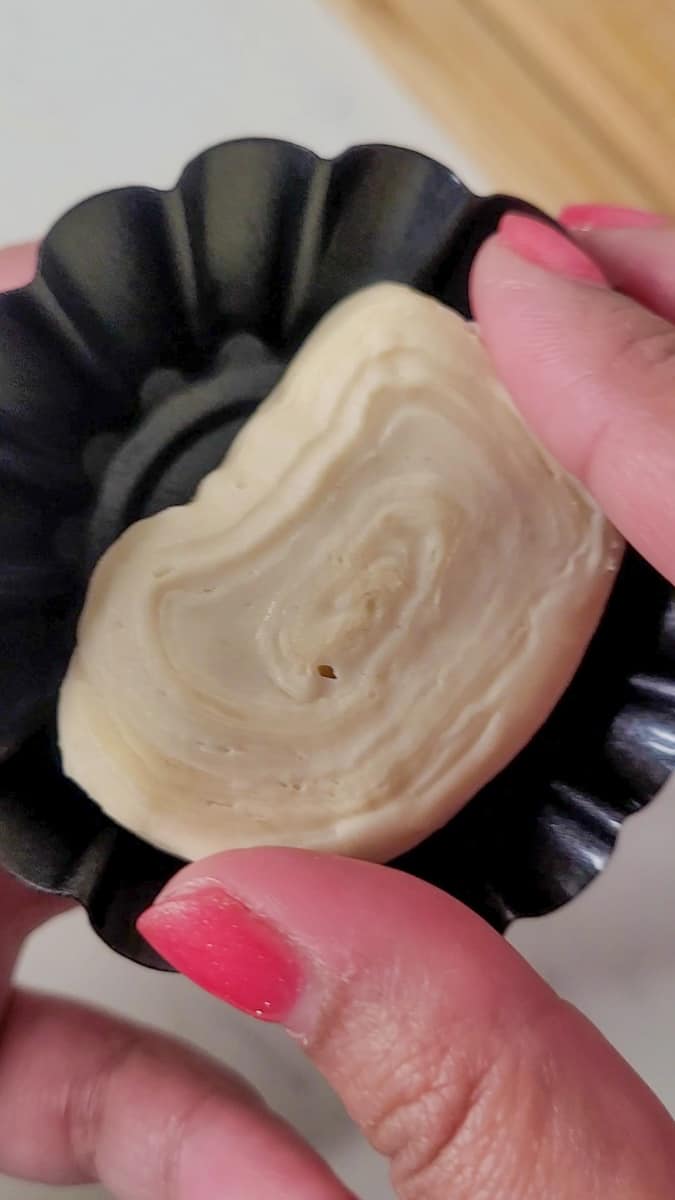
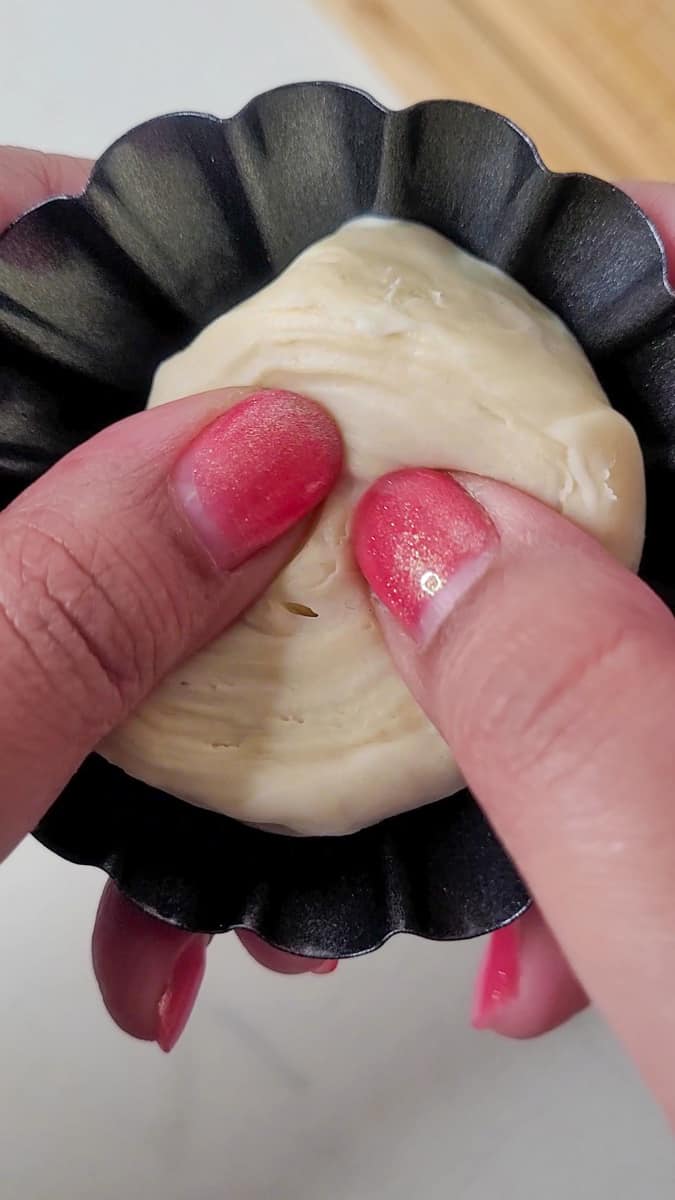
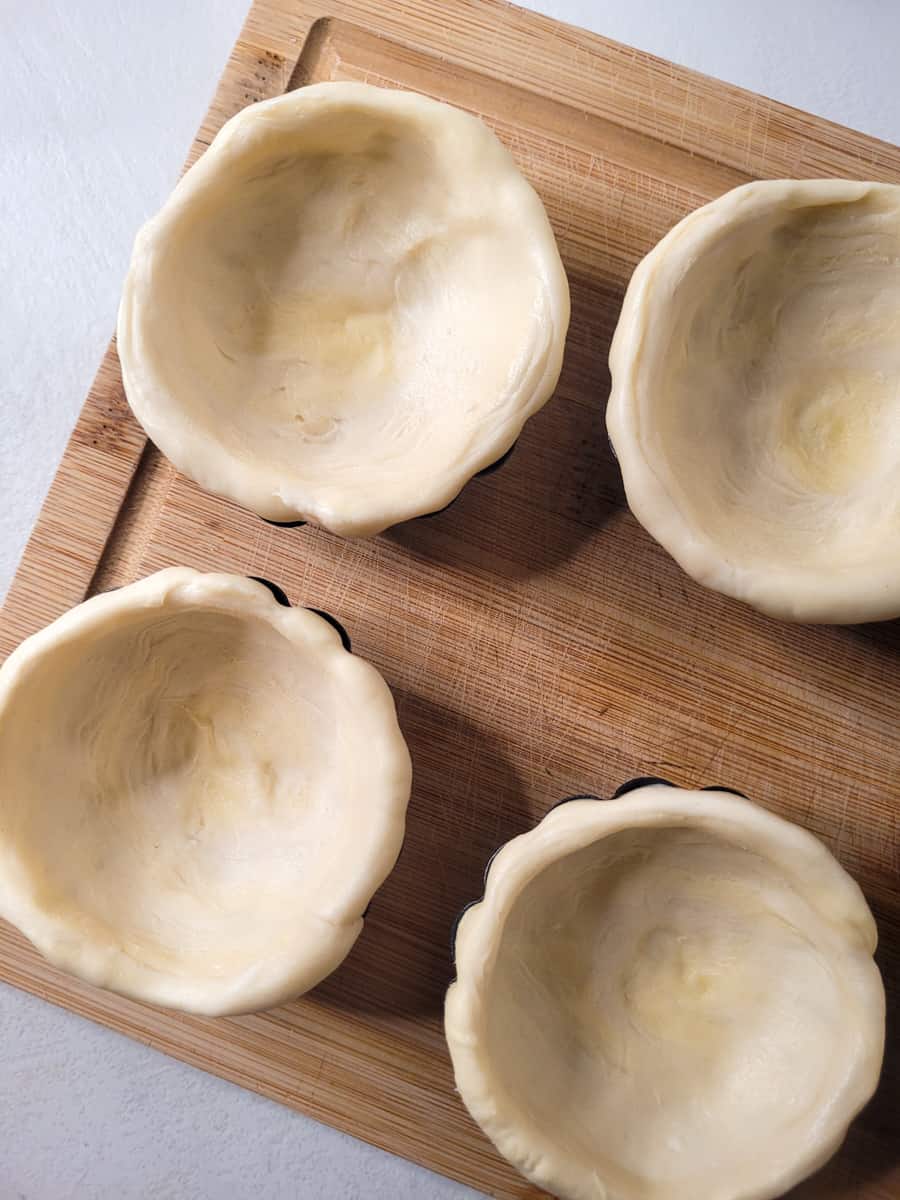
Place a piece of the dough in the center of a mold. Use your thumb to press down the dough and shape it into the mold. Make a two-centimeter overhang to prevent the filling from spilling over when it bakes in the oven. Place the prepared mold in the fridge until ready to use.
Prepare Pastéis de Nata Filling
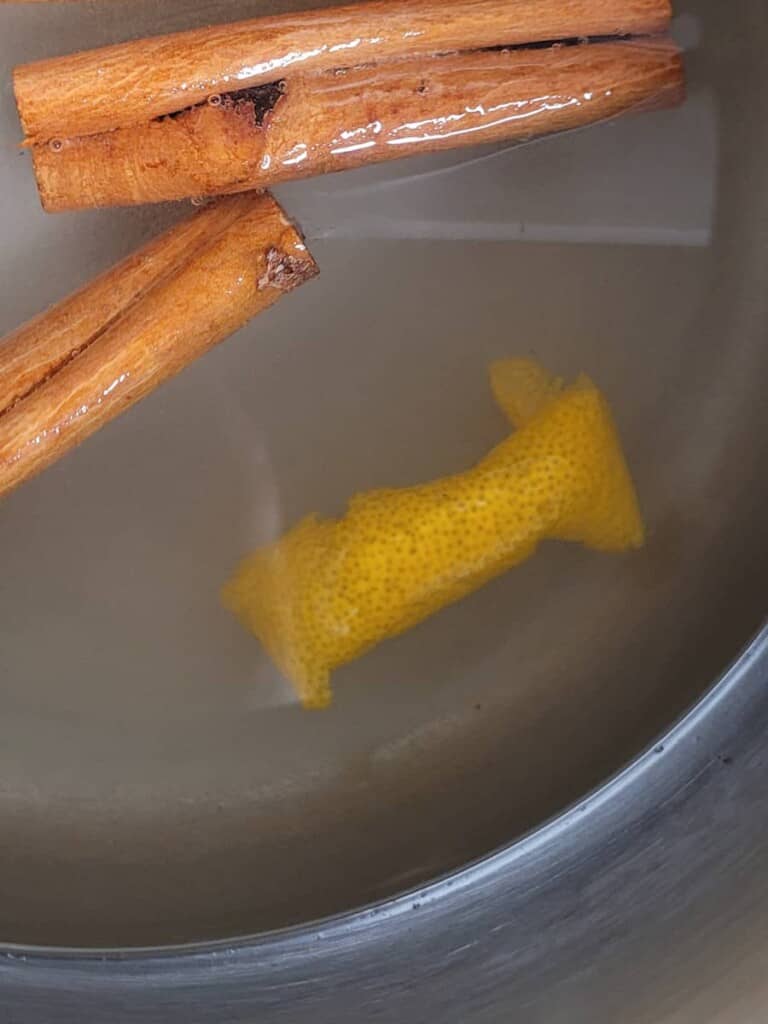
Add sugar, water, cinnamon sticks, and lemon zest to a pot. Place on medium-low heat and stir gently as the sugar melts into the water. Once the sugar dissolves, remove it from the heat and set it aside.
In another pot, add flour, cornstarch, and milk. Mix everything with a whisk until you no longer see lumps.
Tip You may need to scoop the corners of the bottom of the pot to bring up some cornstarch lumps.
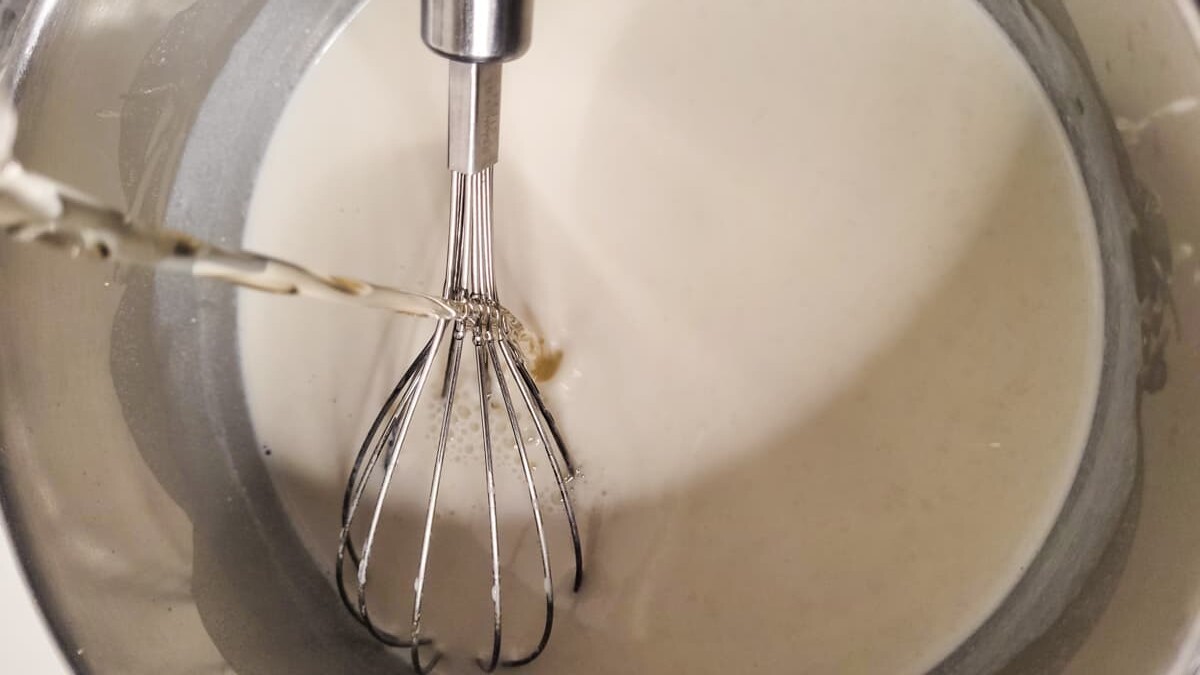
Combine the two fillings by whisking the liquid sugar into the milk mixture.
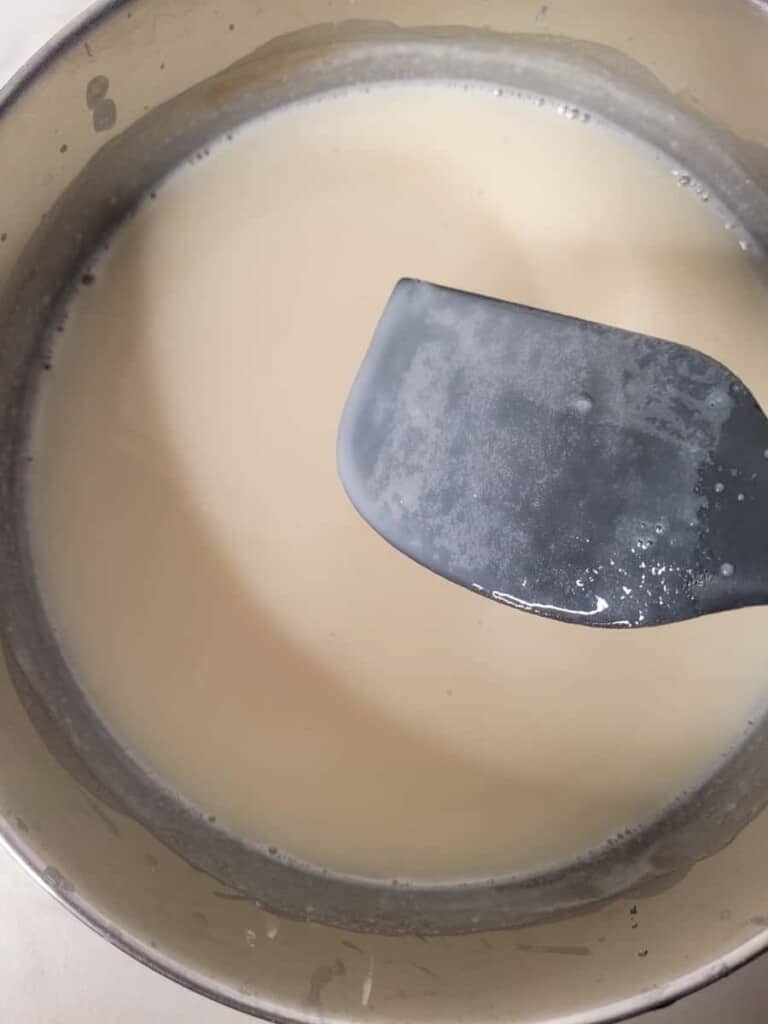
Once the mixture is smooth, place on medium heat and cook while stirring to avoid clumps. Once the mixture has thickened, remove it from the heat and set it aside.
Tip Dip a spoon into the mixture and take it out. If the mixture coats the back of the spoon, it has thickened.
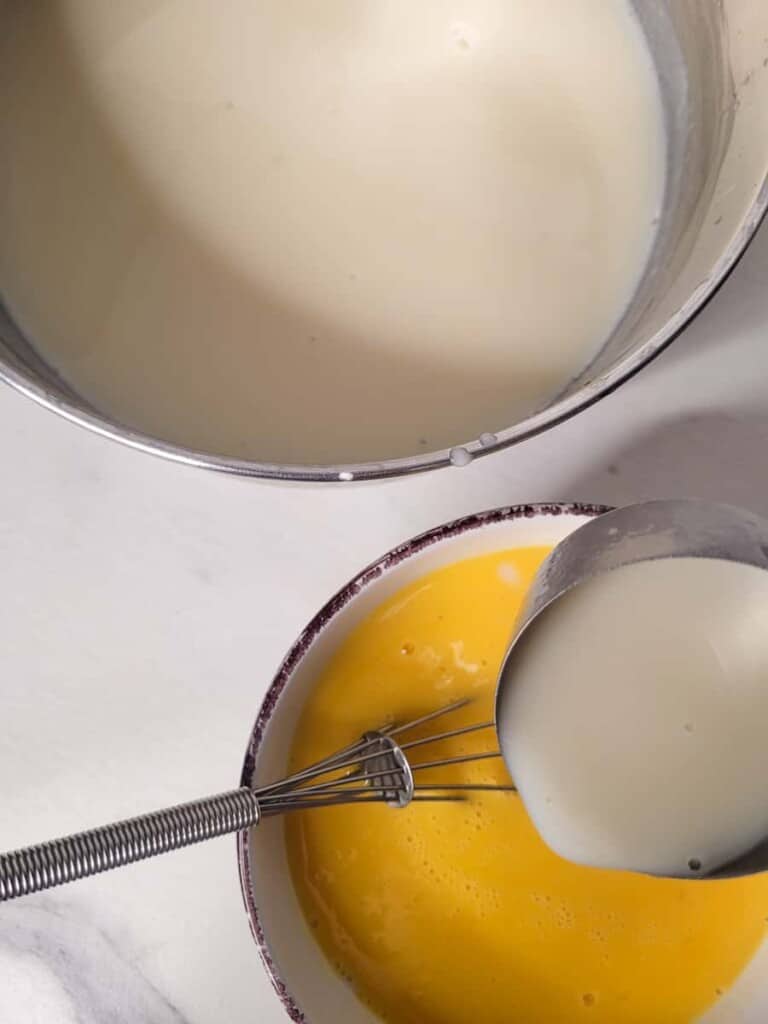
Crack the egg yolks into a separate bowl and add some of the combined mixture to the yolks to temper them. Repeat this process until you feel that the yolks are warm.
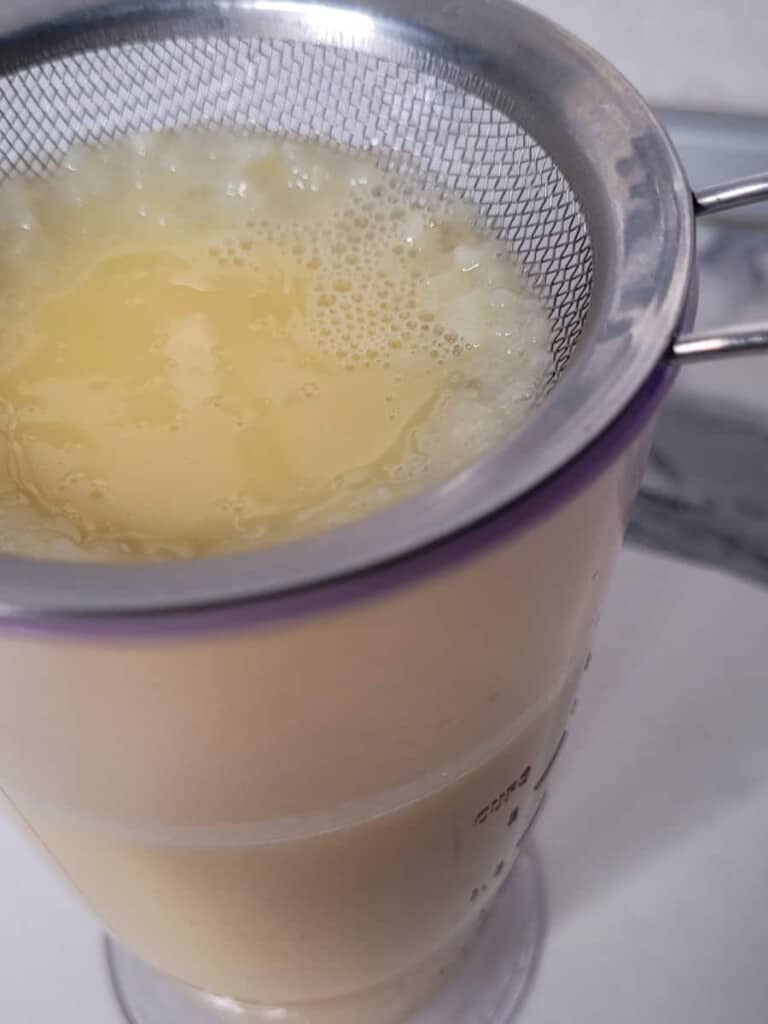
Pour the egg yolks into the rest of the mixture and whisk vigorously, so you don't cook the egg yolks. Then strain through a sieve to get rid of clumps.
Bake the Tarts
Preheat the oven to 200°C (~400°F). Just before the oven is fully heated, remove the prepared molds from the fridge.
Place them on a large lined baking sheet with about an inch or a couple centimeters of space between them.
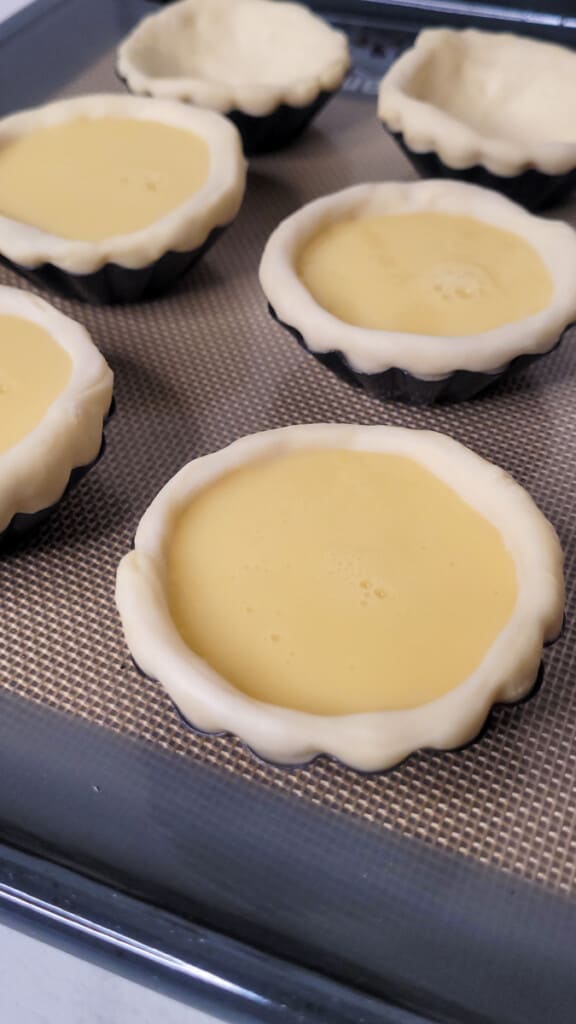
Carefully fill the molds with the egg yolk filling leaving about a centimeter space from the top.
Place the baking sheet in the oven and cook for about fifteen to twenty minutes. At ten minutes, check the egg tarts to make sure they are bubbly and there is some browning on the surfaces of some tarts.
Once fully baked, remove from the oven and let it cool on the counter for ten minutes before removing the tarts from their molds.
How to Serve Portuguese Egg Tarts

Traditional pastéis de nata should be served with an option of either powdered sugar or cinnamon OR both for topping. Another popular accompaniment for these tarts is galão which is one part espresso with three parts foamy steamed milk.
From my experience, these tarts are labor-intensive. But they are easily stored in the fridge for a few days and reheat quickly - about thirty seconds in the microwave. Once you make some. you've ensured at least a week of sweet starts to your day!
Have You Tried This Recipe?
Simply rate the recipe by clicking on the ⭐️s on the recipe card. Have something to say? Please leave me a comment down below telling me what you think of this recipe.
Bonus: Let me and other readers know what you did to make this recipe your own - 💫 let's inspire each other!
Also, follow me on Instagram [@seesfoodwilltravel] and send me a DM with a picture of what you made. I would love to share and celebrate YOUR creation with our budding community 💞
Check out Sees Food, Will Travel on Pinterest and Facebook for more delicious updates.

Classic Pasteis de Nata - Portuguese Egg Tarts
Disclosure
The equipment and ingredients sections contain affiliate links to products I love to use as well as items that I personally believe make this recipe the best version of itself.
Ingredients
- 1 roll pastry dough or ...
Pastry Dough
- 200 grams all-purpose flour
- 2 grams salt
- 100 ml cold water
- 125 grams unsalted butter
Filling
- 200 grams granulated sugar
- 185 ml water
- 2 sticks cinnamon
- 1 large lemon peel/zest
- 250 ml milk
- 25 grams all-purpose flour
- 17 grams cornstarch
- 5 egg yolks
Instructions
Make Dough
- Take two sheets of wax paper and place butter in between. Roll it to a 15x15 cm (6x6 in) square. Wrap it up and place in fridge.
- Add flour, salt and water to a large bowl. Mix until you get a shaggy dough then transfer to a flat work surface.
- Knead the dough for 5-8 minutes until you form a smooth ball. Wrap and place in fridge for 15 minutes.
- Roll out the dough on a lightly floured surface and make a cross with a center large enough for butter slab.
- Add the butter slab to the center then fold the flaps over it.

- Flip upside and place in the fridge to chill for 20 mins
- Remove from the fridge and roll it out to a 15x36 cm (6x14 in) rectangle.
- Make sure to have a long side facing you before you fold. Envision 3 equal sections and fold the left side over the middle then fold the right side over the first fold.Turn the dough quarter turn to the right and the open edge should be facing up.
- Repeat the step above and then cover the dough then chill it for another 20 mins.
- Roll out the dough to a 20x30 cm (8x12 in) rectangle. Pinch a long end to start the rolling process.
- Roll the dough until you reach the other long end.
- Wrap in clingwrap and chill for at least 1 hour.
- Slice evenly sized pieces of the log and place each one into a tart mold
- Press down on the dough with your thumb and shape to the mold.
- Place the prepared molds in the fridge until ready to use
Make Filling
- Make the liquid sugar. In a pot add sugar, water, cinnamon sticks, and lemon zest.
- Place on medium low heat and stir as it cooks. When all sugar has melted remove from heat and set aside to cool.
- Make the milk milk mixture. In a pot, add milk, cornstarch, and flour. Mix until there are no clumps and mixture is smooth.
- Remove the cinnamon sticks and lemon zest from the liquid sugar. Add the sugar syrup slowly to the pot of milk as you whisk.
- Place the combined mixture on medium low heat and stir as it thickens. Once the liquid coats the back of a spoon, remove from the heat. Let cool for 10 mins.
- Crack and separate 5 egg yolks in a bowl.
- Add about a ⅓ cup of the mixture to the egg yolks and whisk. Repeat until the egg yolks are warm.
- Add the mixed egg yolks to the rest of the milk sugar in the pot and whisk vigorously to keep the egg from scrambling. Then strain into a container through a sieve.
Bake Tarts
- Preheat oven to 200°C (~400°F)
- Remove prepared tart molds from the fridge.
- Add the filling to the tarts by carefully pouring into each mold. Leave a centimeter space from the edges.
- Bake for 15-20 mins until tops have scorch marks.
- Cool on the counter for 10 mins before removing from mold
- Serve with powdered sugar and cinnamon powder


Maggie says
I'm definitely going to try this out (I love making laminated pastry doughs lol). Do you think a standard muffin tin would be a good substitute if I don't have the small tart molds?
Joanne says
Homemade laminated dough absolutely pays off 😉 Yes, muffin tins work - the tarts may end up a bit deeper, but you'll have more room for filling!