
I developed this matcha Portuguese egg tart recipe out of my love for both matcha tea and pastry. Egg tarts are treats I would happily indulge in all day long if they were not so calorie-filled. I also see matcha lattes as a special drink to enjoy every now and then. So combining these two decadent items was a no-brainer. Jump here if you want to get some tips on how to achieve a perfect surface with cute burn marks on your matcha Portuguese egg tarts.
Portuguese Egg Tarts vs. Hong Kong Egg Tarts
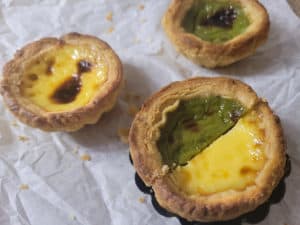
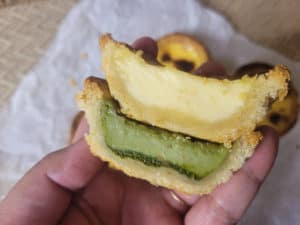
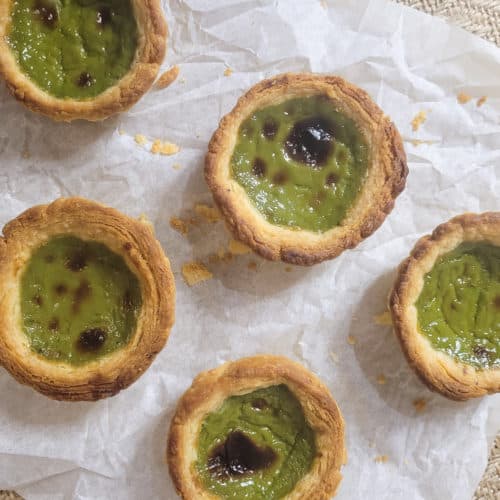
The most evident difference between these two egg tart styles is that Portuguese egg tarts have a signature burnt caramelized topping similar to creme brulee. Hong Kong egg tarts, or dan tat, have smooth surfaces and are typically lighter in color and taste. The crusts are also different. Hong Kong egg tarts usually have a more crumbly crust than the Portuguese tart's layered and flaky crust.
Portuguese pastries have a weighty and rich mouthfeel, which I love. Hong Kong egg tarts are best for those who enjoy a light, aerated, and delicate taste. I believe Hong Kong egg tarts, which are typically found in dim sum restaurants, truly embody the phrase "touch of heart."
A Note on Macanese Egg Tarts
I was lucky enough to try Macanese egg tarts while visiting Macau. Macanese egg tarts are Portuguese egg tarts redeveloped with local ingredients available to a British pharmacist named Andrew Stow in 1990. He was inspired by the pastel de nata of Portugal and redeveloped the recipe locally when he returned to Macau. These egg tarts eventually became a hit, and the Macanese egg tart was born. Lord Stow's Macanese tarts are even heavier and creamier than typical Portuguese egg tarts.
Why Matcha Portuguese Tarts?
I enjoy baking, but I haven't ventured far out enough on less conventional recipes. I love making pies, yet I also want to establish a variety of go-to recipes that involve pastry in smaller sizes (portion control, anyone?). At the same time, I recently got back into drinking matcha. I discovered Ippodo's Hatsu matcha described as perfect for lattes and baking. When I saw that, I knew I wanted to include matcha in developing my own small pastry recipes!
Drinking Matcha vs. Cooking-Grade Matcha
I could totally go on a tangent with the number of things I learned from years of drinking matcha tea! But to make a long story short, there are different types of matcha available, depending on what you plan to do with this vibrant green powder.
Essentially, any matcha you consider expensive should be sipped as tea because those contain the most vitamins and caffeine. Hatsu is about $10 for 40 grams on Ippodo's website. This is one of their larger sizes and considered inexpensive for the brand. Most important of all, it is specifically labeled as matcha for lattes and cooking. Matcha for drinking tends to be more bitter than cooking matcha. If you still aren't sure, check the label on the matcha you buy to see how to best utilize it.
How to Make Matcha Portuguese Egg Tarts
The recipe at the bottom of this page is basically a Portuguese egg tart recipe that allows you to add matcha powder. Everything from the crust to the baking time is vital in making the perfect egg tart. I recommend making the crust the night before to focus on one section per day.
Make the Crust
I myself love a flaky crust, so the crust for this recipe is a very rough pastry puff dough. This will ensure a crisp, yet light texture all over because of the chunks of butter that are folded into the dough.
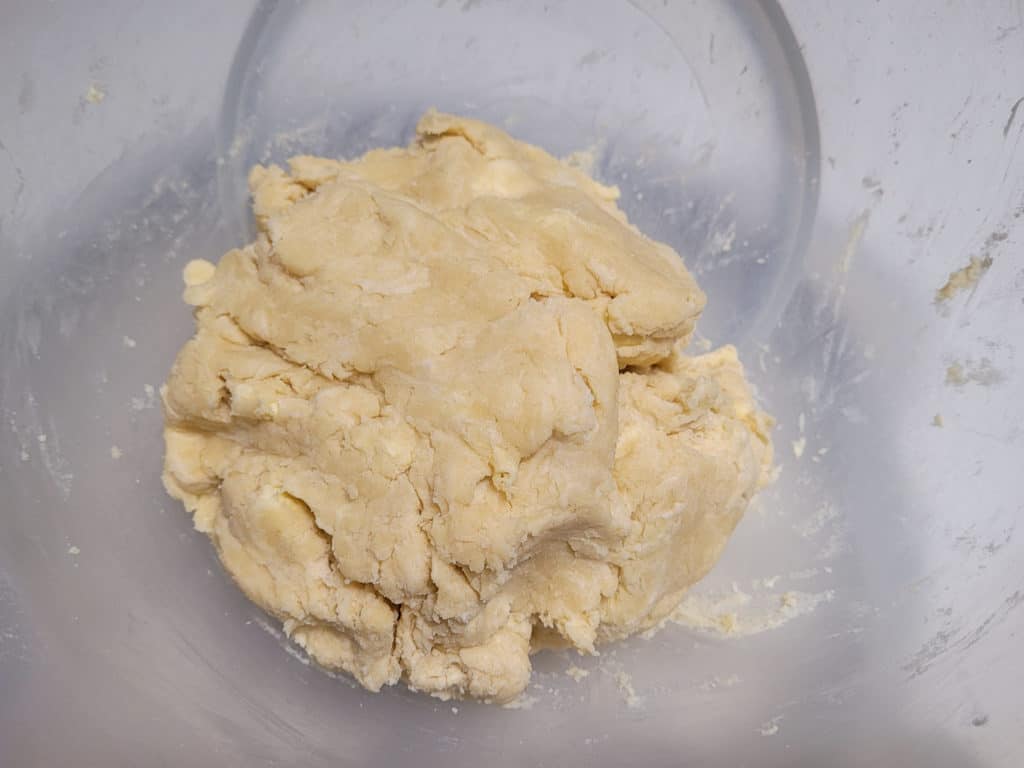
Add your dough ingredients to a bowl, minus the ice water. Then incorporate the butter roughly until you get a shaggy dough, adding the ice water a little at a time. It should come together without looking too dry. You should still see bits of butter in your dough as you form it into a ball. Put it in the fridge for thirty minutes to rest.
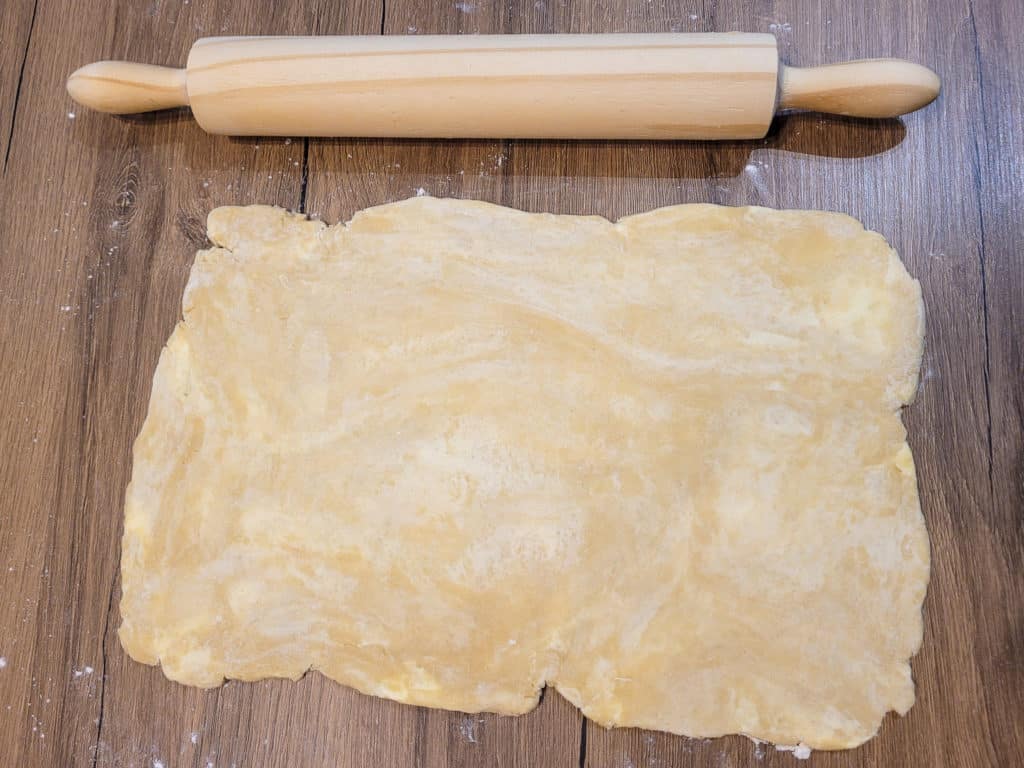
After thirty minutes, take your dough out and flatten it out to a 10x14 inch rectangle.
Make a log roll and then wrap it with cling wrap. Tighten the log by twisting the cling wrap at the two ends.
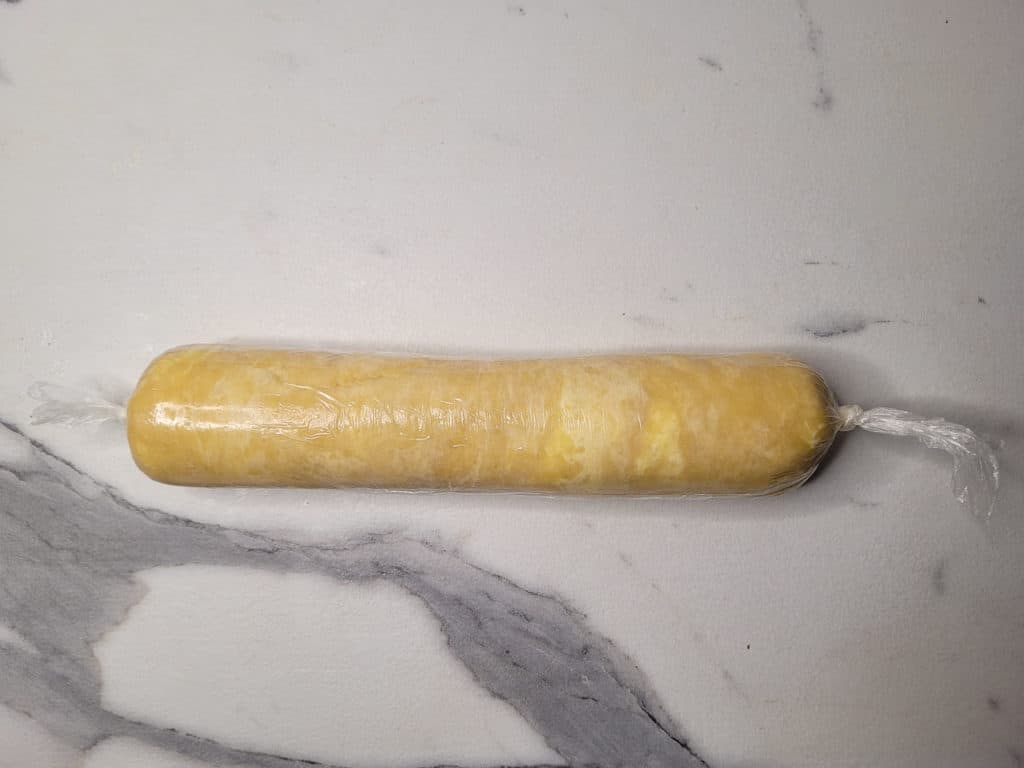
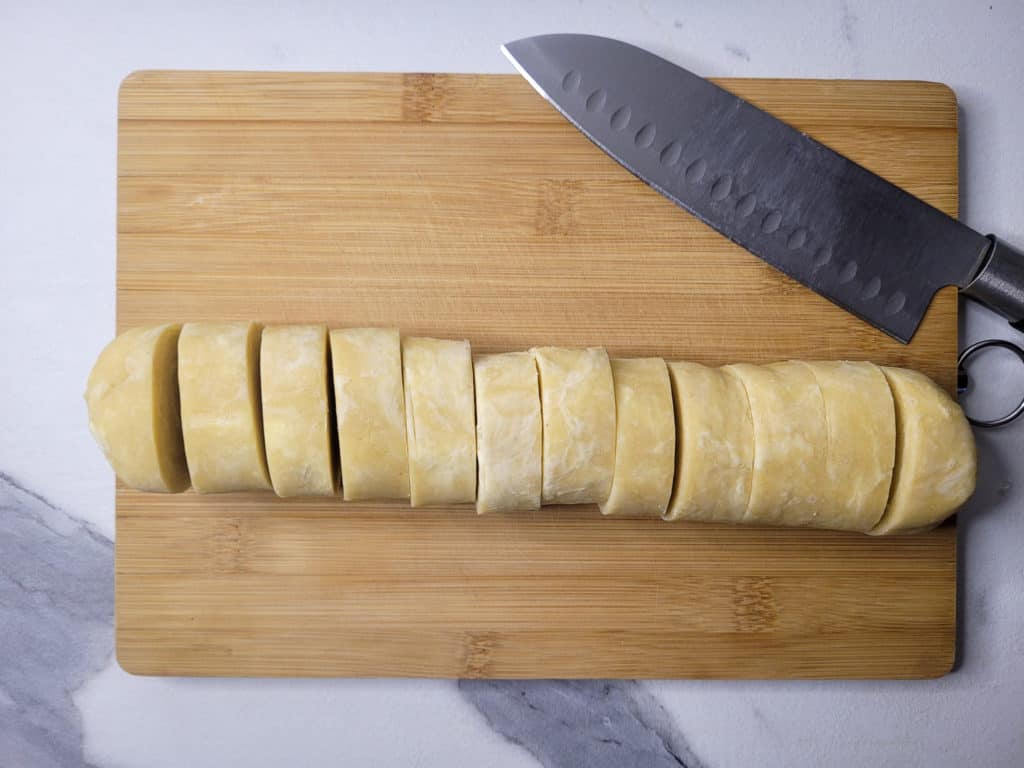
Put it back into the fridge for at least thirty minutes to rest all the way overnight. Before making the filling, take the log out of the refrigerator and cut it into 12 even pieces.
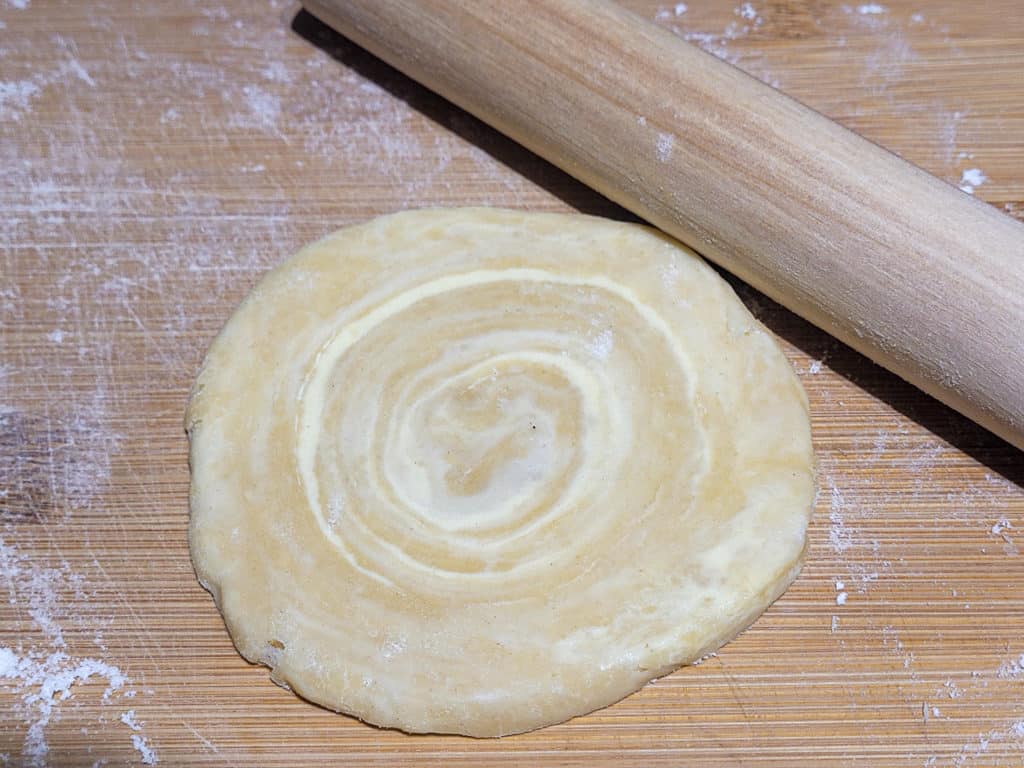
Then roll it out to just a bit larger than the diameter of the widest part of your tart tins. Aim to have about ¼ inch extra on all sides.
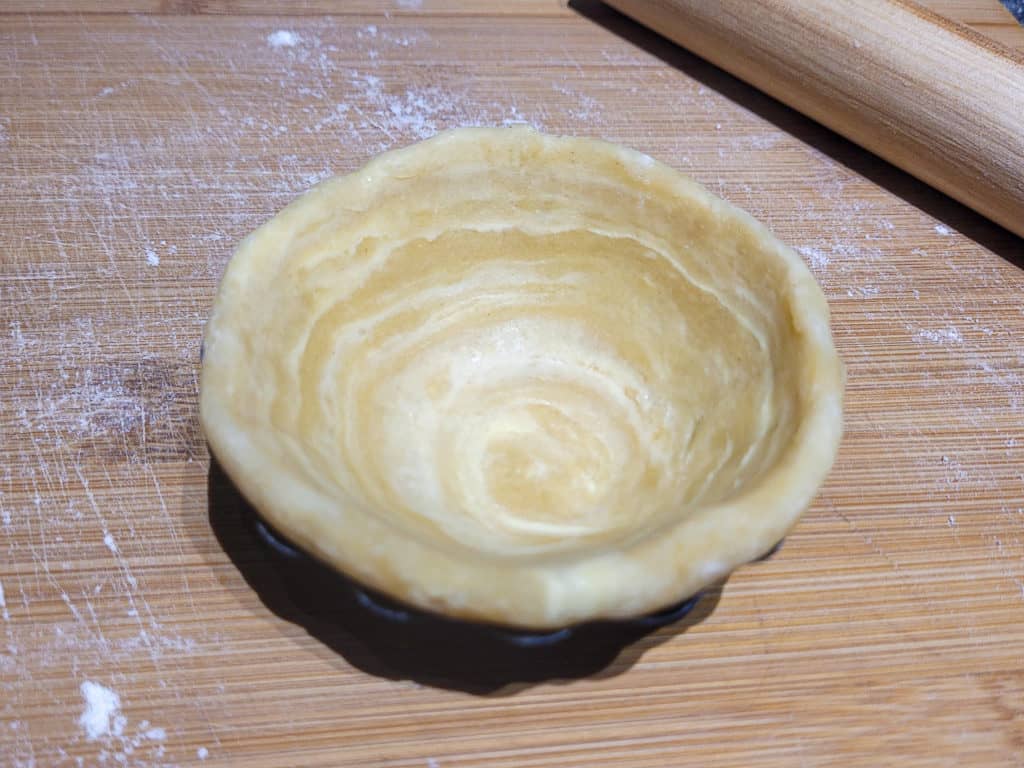
Form the pastry dough in the tins and leave it in the fridge again until you are ready to bake.
Make the Filling
Before you create the filling, make sure to preheat your oven! Then, crack the eggs and separate the yolk from the whites. The best way to do this without breaking your yolk is to use cold eggs so they separate easily. Add your yolks to the bowl along with the rest of the ingredients minus the matcha. Then, mix them together until all cornstarch clumps have dissolved.
Grab a small pot and a sieve, then pour the filling mix through the sieve into the pot. We want to eliminate any chunky bits at this point.

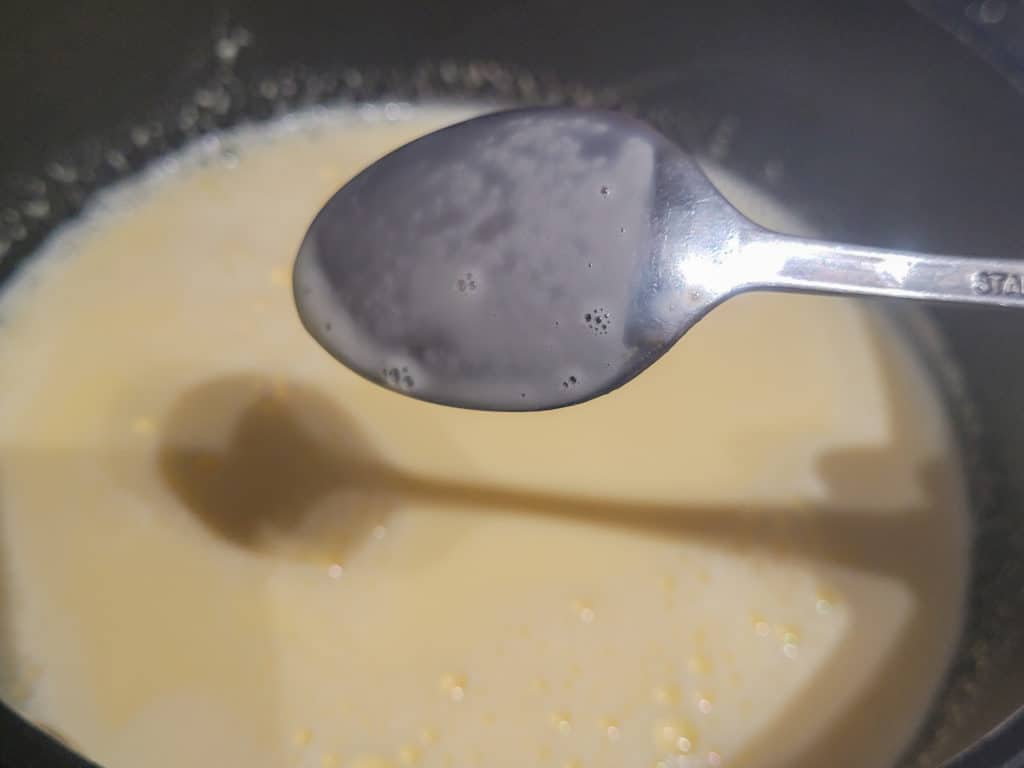
Set the stove to medium heat and cook the filling mix for about two minutes. Dip a clean spoon into the pot and lift it up. The filling has finished cooking when the spoon is coated with a slightly thick liquid.
If you are making non-matcha Portuguese egg tarts, you can take them off the stove and skip the next step.
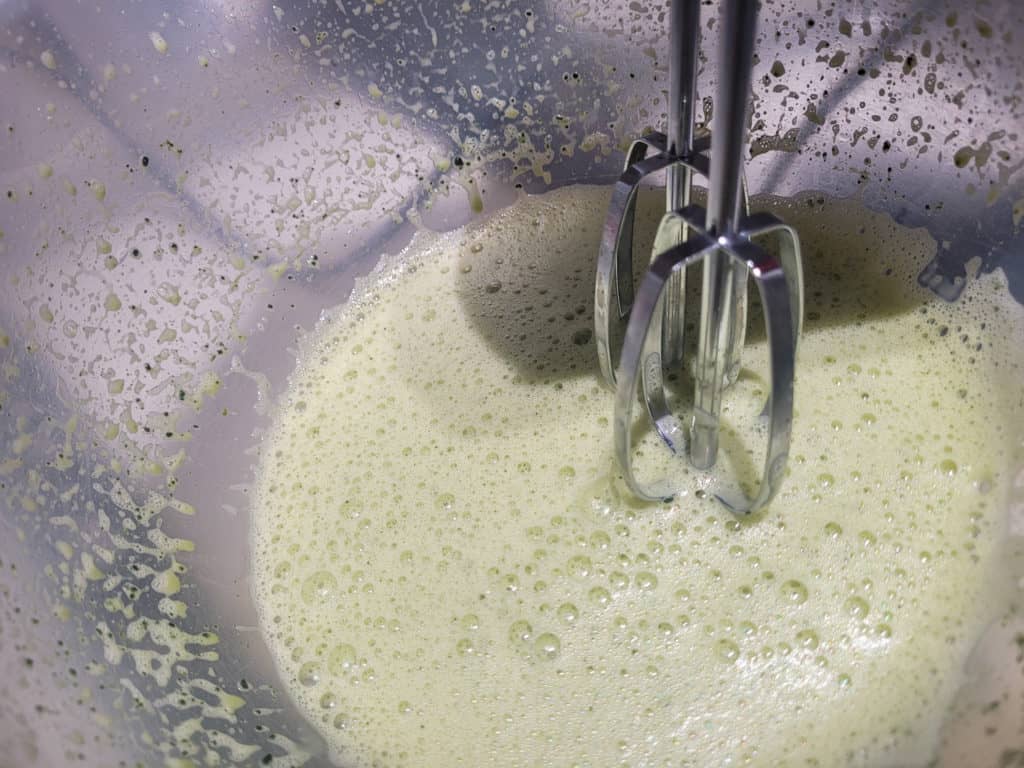
Sift the matcha powder into the mix. This is important because matcha is notoriously difficult to mix into anything other than water. Using an egg beater or immersion blender, mix the matcha until no clumps are visible. You may end up with a very foamy mix depending on the type of matcha you use. Tap the container a few times on the counter to eliminate as much foam as possible.
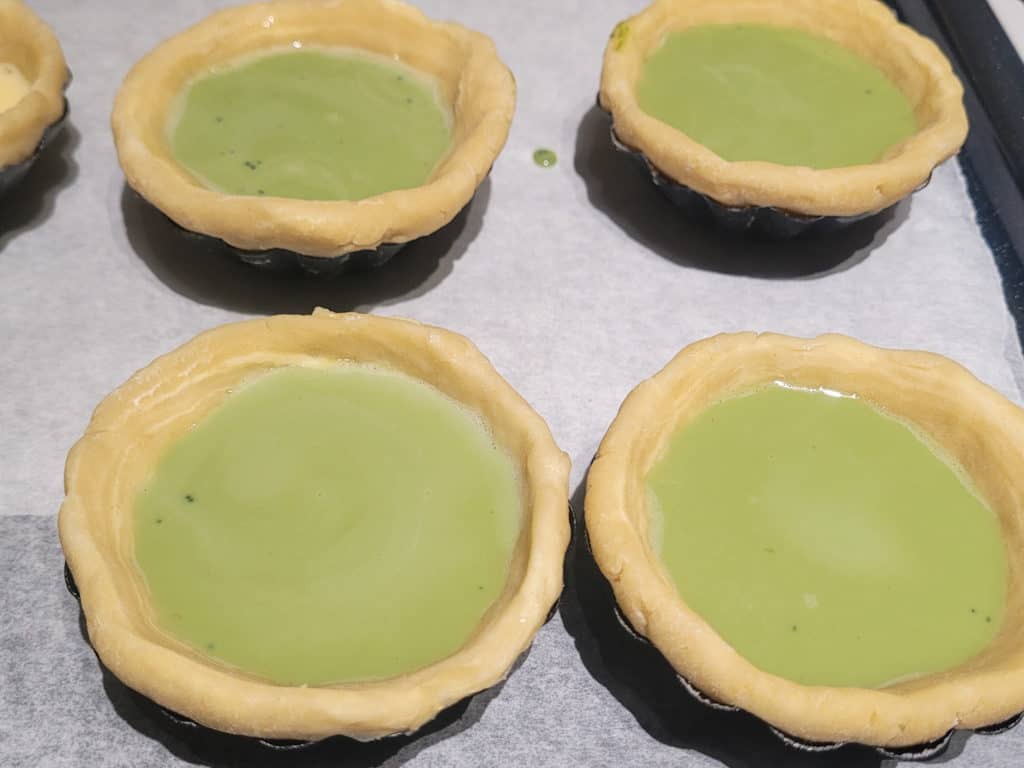
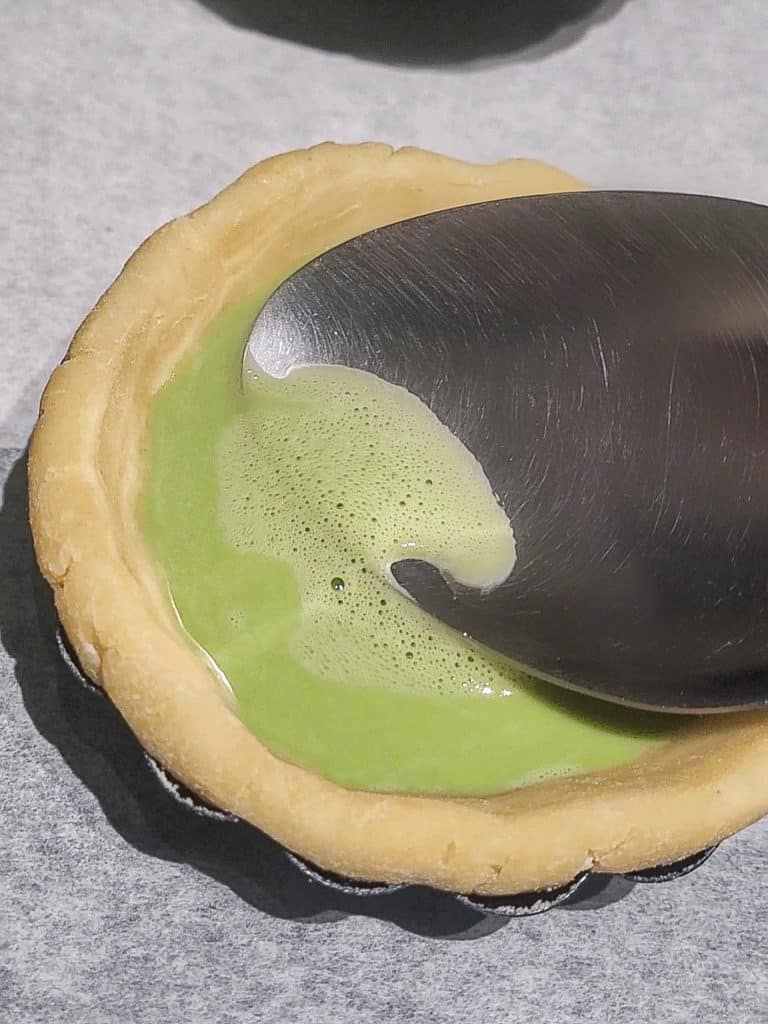
Using a sieve, pour the filling into the molded tarts. Important Tip: If some tops have air bubbles, use a spoon to skim them off the surface. If you bake the bubbles, they will bake into a textured mass on top of your tarts, and you won't get those signature burn marks.
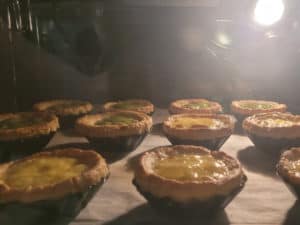
Transfer the tarts to a large baking sheet and set them about an inch apart. Then bake them for 10 - 15 minutes. Observe these tarts while they bake because the crust can burn quickly! Your pastries are done when the filling has puffed up with some burn marks and is slightly jiggly. My oven cooked the tarts in fifteen minutes.
Make Six Regular Tarts and Six Matcha Tarts
You can use this recipe to make twelve Portuguese or twelve matcha egg tarts. If you want to have both, you can use it to make six regular tarts and six matcha tarts. Just use half of the matcha amount listed. After heating the mixture, divide the egg mix into two containers and mix the matcha into one of the containers before you pouring into the molds.
Have You Tried This Recipe?
Simply rate the recipe by clicking on the ⭐️s on the recipe card. Have something to say? Please leave me a comment down below telling me what you think of this recipe.
Bonus: Let me and other readers know what you did to make this recipe your own - 💫 let's inspire each other!
Also, follow me on Instagram [@seesfoodwilltravel] and send me a DM with a picture of what you made. I would love to share and celebrate YOUR creation with our budding community 💞
Check out Sees Food, Will Travel on Pinterest and Facebook for more delicious updates.
Matcha Portuguese Egg Tarts
Disclosure
The equipment and ingredients sections contain affiliate links to products I love to use as well as items that I personally believe make this recipe the best version of itself.
Ingredients
Rough Pastry Dough
- 200 grams unsalted butter, cubed
- 210 grams all-purpose flour
- 6 tablespoon ice cold water only use as much as you need
- ¼ teaspoon salt
Filling
- 80 grams heavy cream
- 80 grams granulated sugar
- 200 ml milk
- 4 egg yolks
- 1½ tablespoon cornstarch
- 4 teaspoon cooking-grade matcha skip if making regular Portuguese egg tarts
Instructions
Make Pastry Dough
- Add flour and salt into a bowl and mix
- Add butter and coat the butter with flour. Using hands, make a rough dough by pinching the butter into smaller pieces and incorporating the flour. You should see large pea-size chunks of butter in the dough.
- Add water a little at a time to form a dough. It's finished when the dough comes together and doesn't stick to the side.
- Form a rough disk and put it in the fridge to rest for at least 30 minutes
- Flatten out the dough to a 10x14 inch sheet and then roll it up into a log from the shorter side. Wrap it with cling wrap and twist the ends to close the wrapping. Put it back in the fridge for at least 30 minutes, preferably overnight.
- Remove the cling wrap, then slice the log into twelve equal pieces.
- Roll out each piece to a disk. Each should have about ¼ inch overhang on the tart molds.
- Put the tart molds with pastry dough back into the fridge until ready to fill.
Make Filling
- Preheat oven to 225°C (~440°F)
- In a bowl, add egg yolks, sugar, milk, heavy cream, and cornstarch. Whisk until all cornstarch lumps have disappeared.
- Pour the mix into a pot through a sieve. Then set the pot on the stove on medium heat for 2 minutes while stirring it at the same time.
- Dip a clean spoon into the mix and pull it out. Watch the consistency of the egg mix, it should still be thin but coat the spoon. If you are not getting the desired result, heat it longer for 1 minute at a time and do the spoon test again. When you are finished, remove the pot from the heat and pour the mix into a container with a spout .
- Step for Matcha Egg Tart Sift the matcha powder into the egg mix and use an egg beater to mix everything together.
- Remove the pastry tins from the fridge and fill each mold about ⅝ full. Transfer all tarts to a large baking sheet and place them an inch apart from each other.
- Put the baking sheet in the oven for about 15-20 minutes. After 10 minutes, check the tarts for any potential burning. If you observe some tarts cooking faster than others, rotate your baking sheet. Bake until custard is set and has dark spots. Do not bake for more than 25 minutes or the custard will curdle.


Kara says
I tried this recipe with and without matcha. Classic egg tarts are great, but I just loved the matcha flavor more. It was an easy recipe to follow and the crust is sooo flakey and good. I’m definitely going to make these again!
Joanne says
Thanks so much for your feedback!
kezia says
I have made these three times. It's sooo delicious!
Joanne says
Your message just made my day, Kezia! Thank you 🥺 And I know... they're addicting!
Dylan says
phenomenal recipe!
Joanne says
Thanks Dylan! I'm so glad you like it!